How To Clean New Balance 550
[ How To ]
Article
 Play video
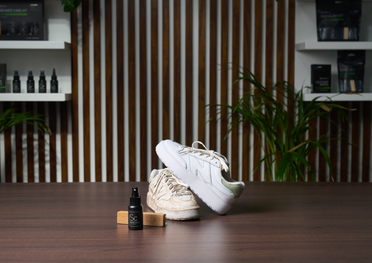
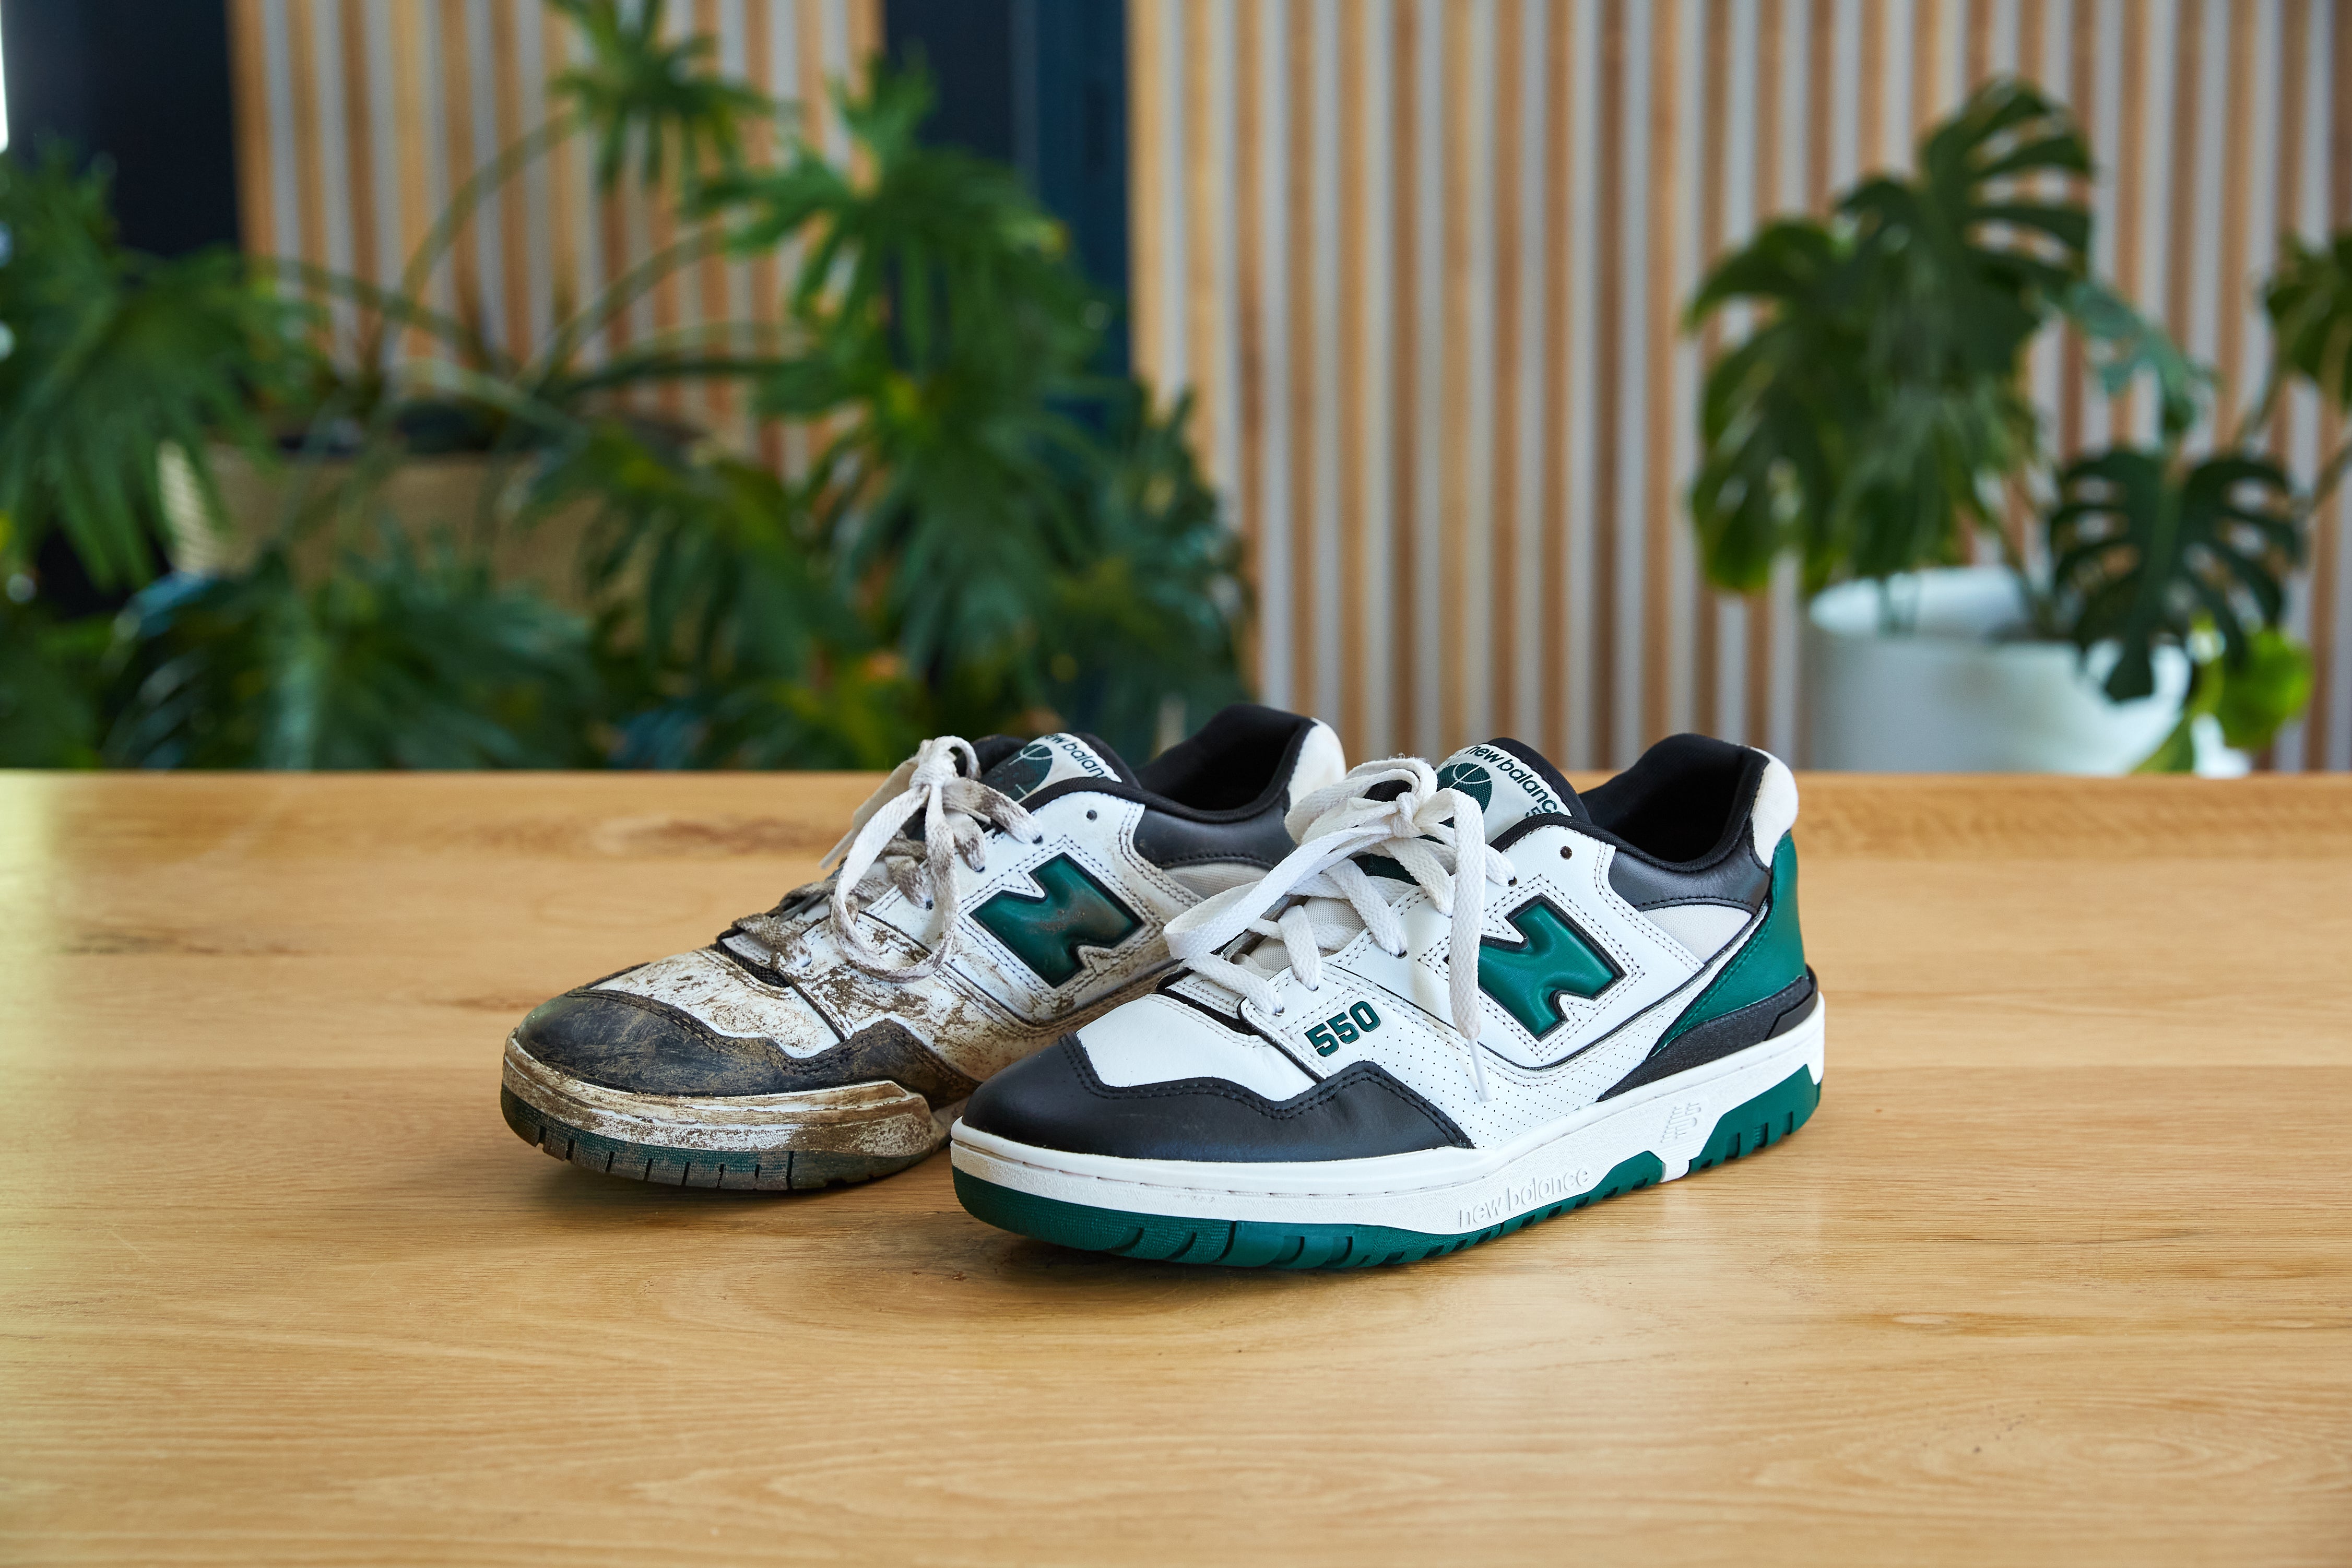
We got our hands on a dirty pair of New Balance 550 sneakers and we thought to document the cleaning process to show you the best way to look after your sneakers.
The 550 was originally released in 1989 with the 550 following the industry’s trend of brands offering a low-top counterpart to their marquee hoops-ready footwear. This basketball sneaker then received a new lease of life through Aimé Leon Dore’s (ALD) drop of the 550. On September 21st 2020, Teddy Santis, ALD’s founder shifted the trajectory of both New Balance and ALD by unveiling four colorways of the 550 and it has since become a must have for all sneakerheads around the globe.
The 550 was originally released in 1989 with the 550 following the industry’s trend of brands offering a low-top counterpart to their marquee hoops-ready footwear. This basketball sneaker then received a new lease of life through Aimé Leon Dore’s (ALD) drop of the 550. On September 21st 2020, Teddy Santis, ALD’s founder shifted the trajectory of both New Balance and ALD by unveiling four colorways of the 550 and it has since become a must have for all sneakerheads around the globe.
Sneaker LAB is excited to announce our partnership with New Balance in the Asia-Pacific regions. Now you can purchase your favourite Sneaker LAB products while you’re shopping for the latest pair of New Balance sneakers.


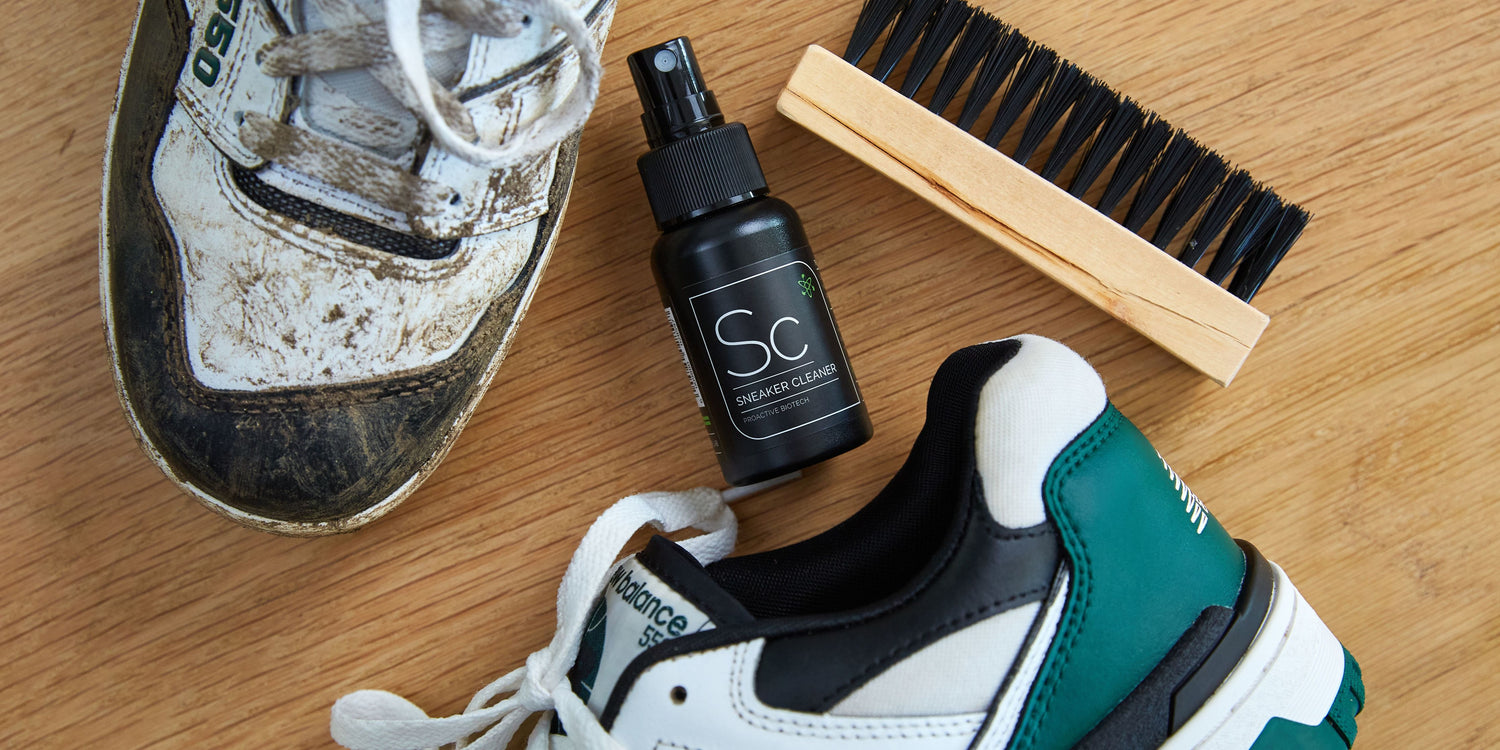
We used the products found in our Premium Kit and our Leather Care to clean and look after this pair. The Premium Kit consists of our Sneaker Cleaner, Sneaker Protector, Odor Protector and Premium Brush.
Step 1:
First you will need to prepare your shoes for a deep clean! Remove the laces from the shoes and set them aside as you will clean those at a later stage. Grab our Premium Brush and dry brush off any excess dirt that may be laying on the surface of the shoe.
Step 1:
First you will need to prepare your shoes for a deep clean! Remove the laces from the shoes and set them aside as you will clean those at a later stage. Grab our Premium Brush and dry brush off any excess dirt that may be laying on the surface of the shoe.
Step 2:
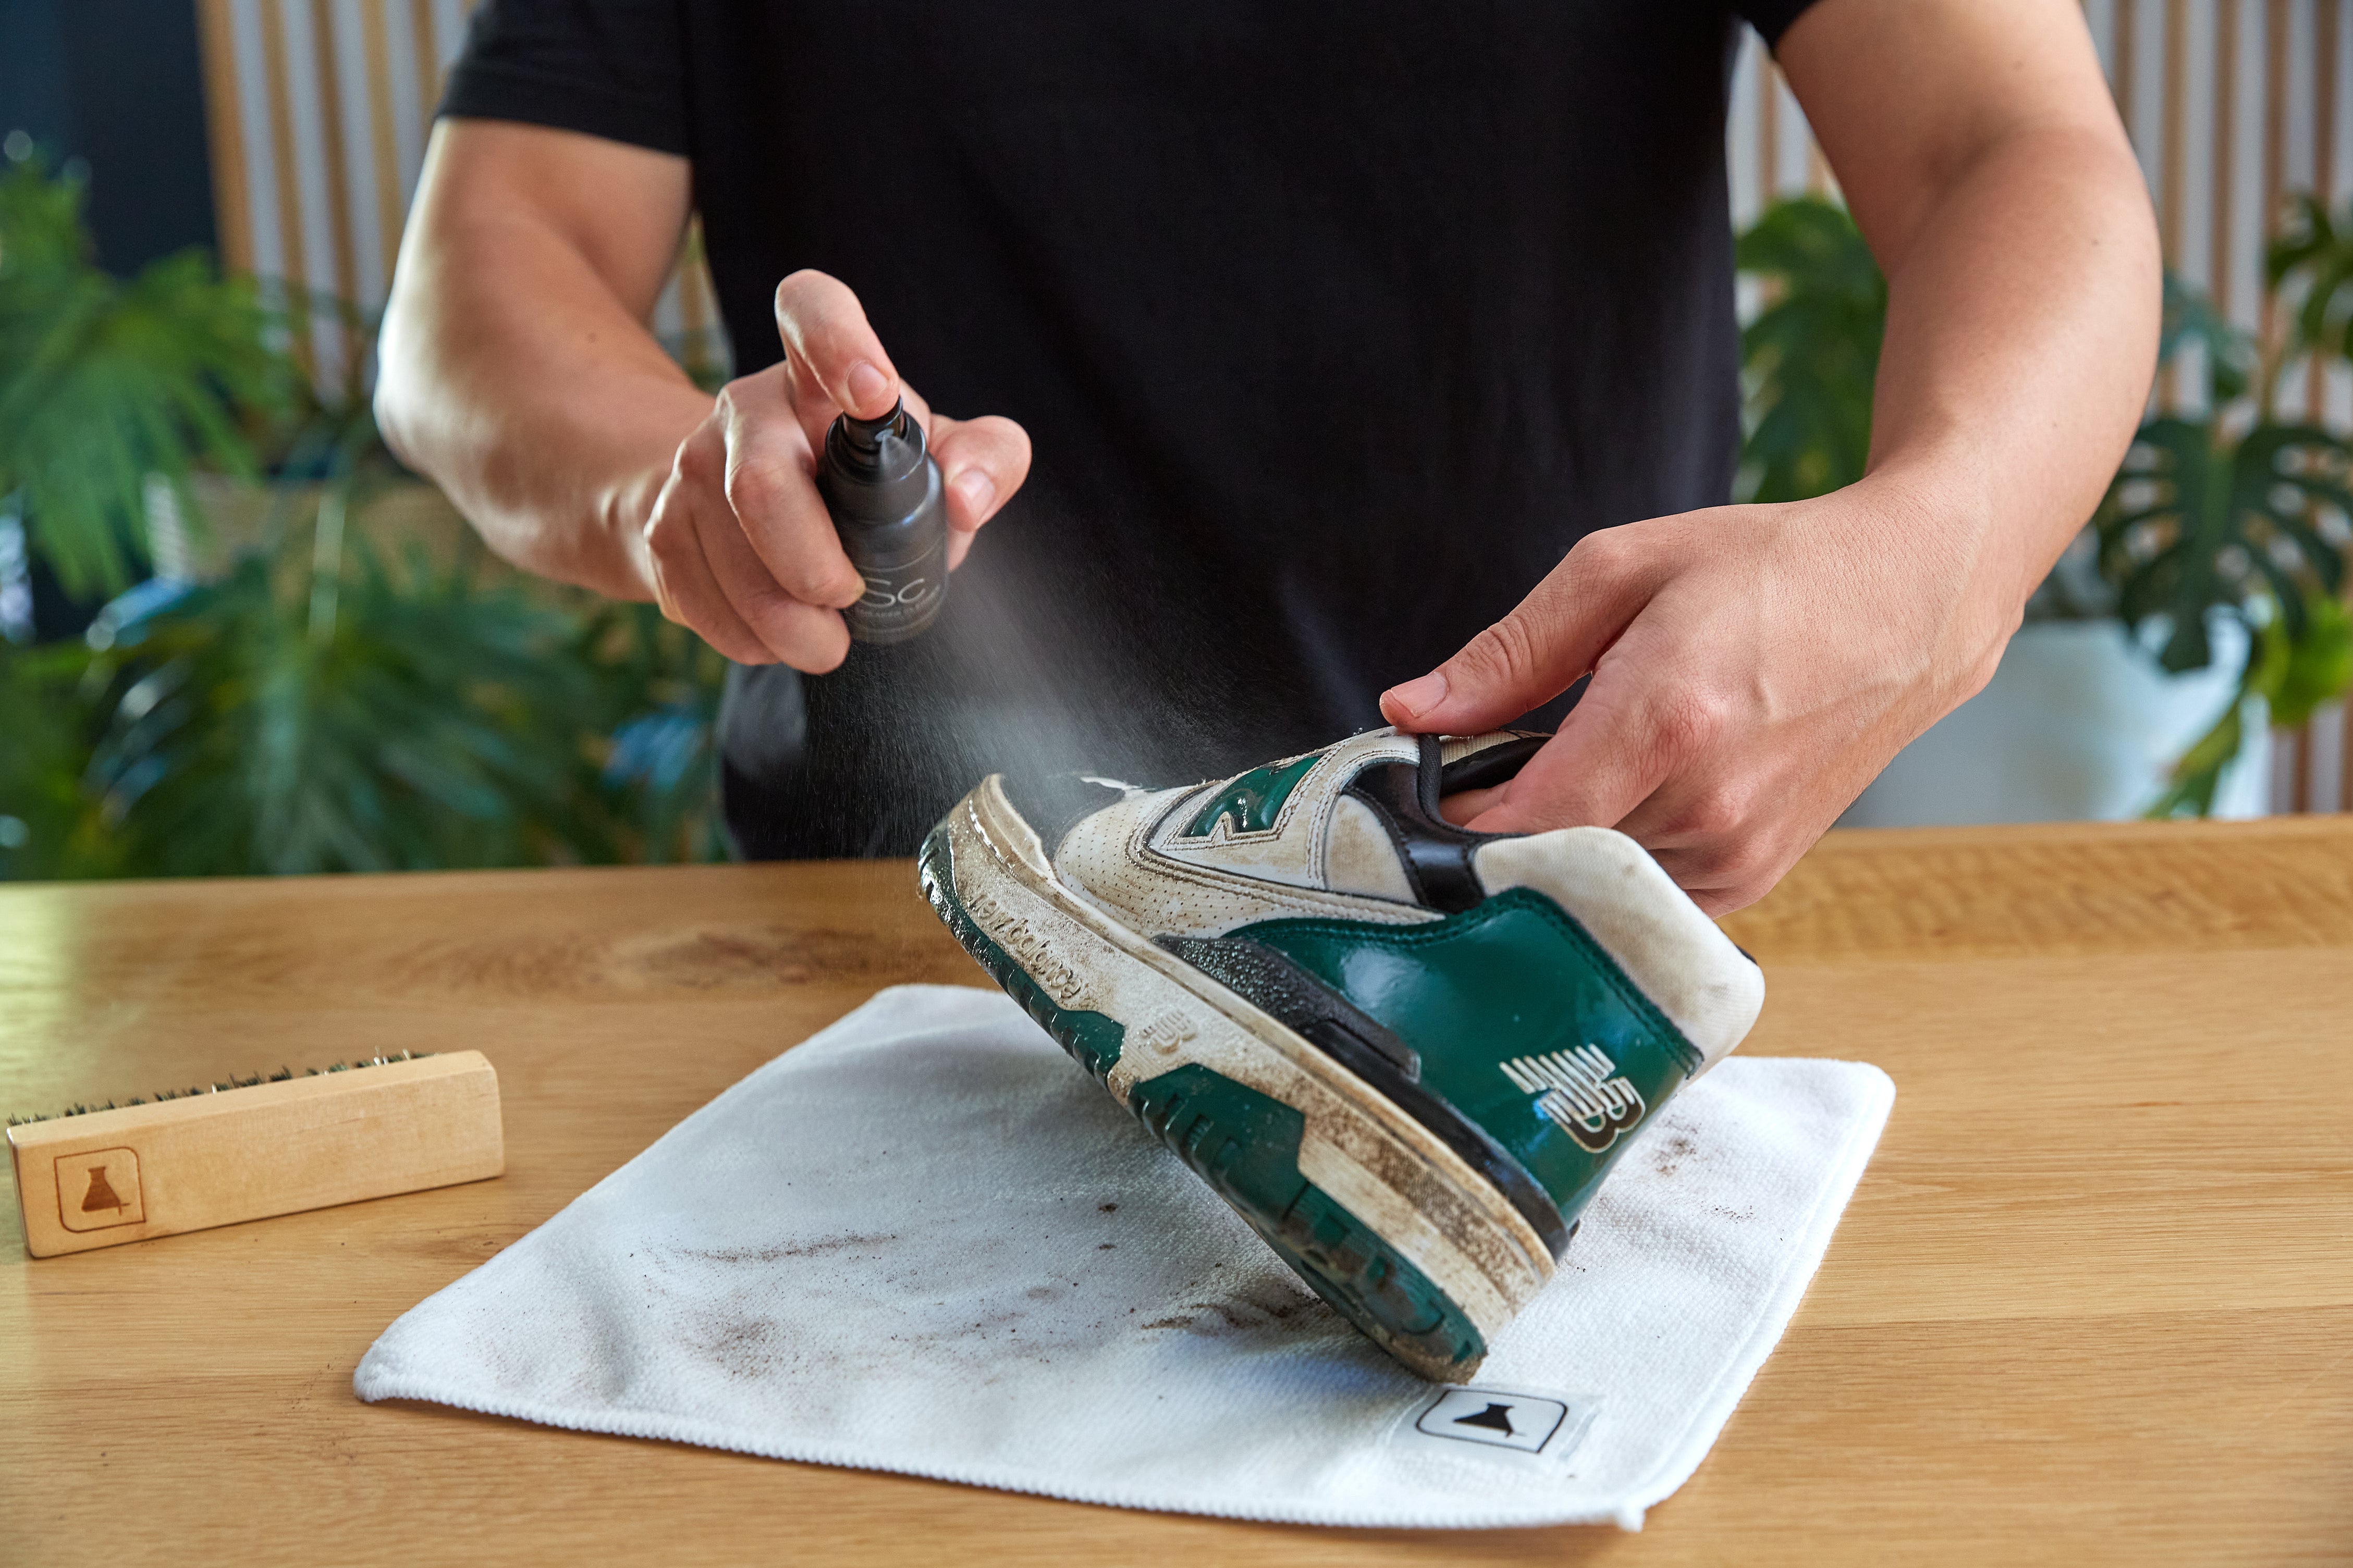
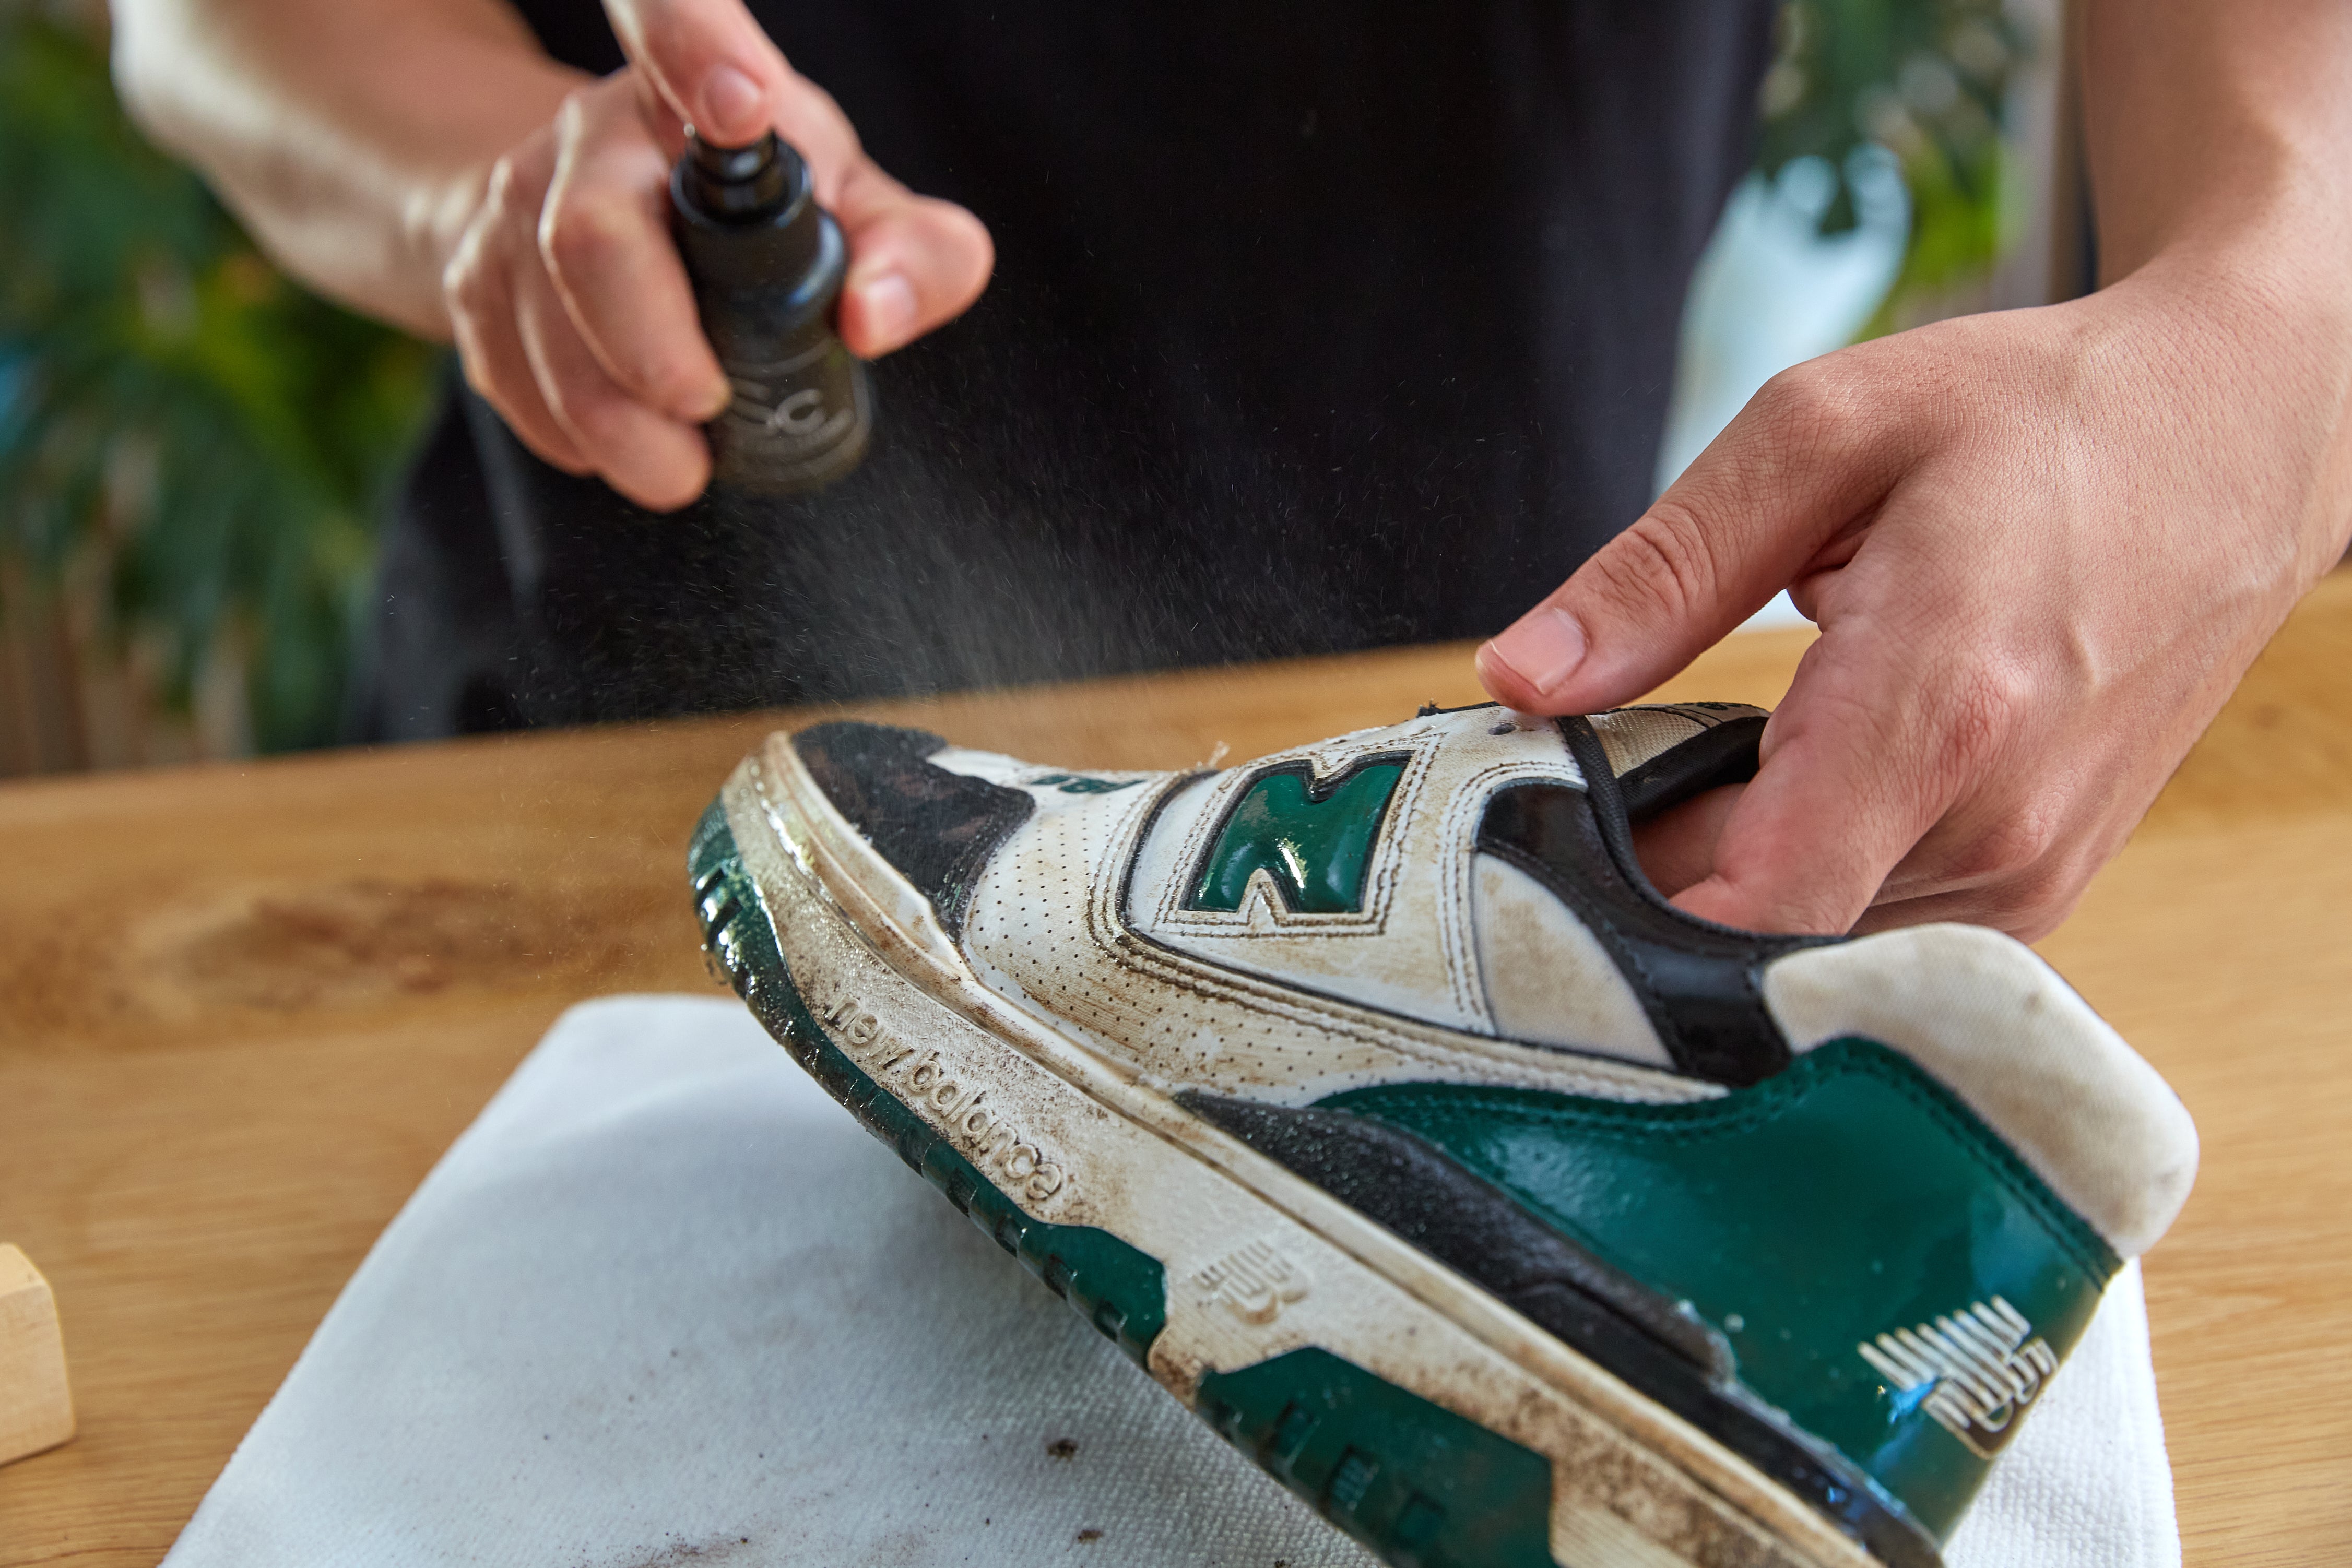
Spray Sneaker Cleaner around the uppers of the sneakers and focus on the heavily dirtied areas. Then grab our Premium Brush and then dip into a container of water. Start scrubbing in a circular motion. The water and Sneaker Cleaner solution will react together creating a form that will remove the dirt on the sneakers. On this particular model of 550, the majority of the sneaker is made up of leather but there are mesh panels that will need more attention when cleaning. Use more Sneaker Cleaner on these areas, and dip the Premium Brush into water and scrub in a circular motion. This process may need repeating to lift out the dirt that has embedded itself into material.
Spray Sneaker Cleaner around the uppers of the sneakers and focus on the heavily dirtied areas. Then grab our Premium Brush and then dip into a container of water. Start scrubbing in a circular motion. The water and Sneaker Cleaner solution will react together creating a form that will remove the dirt on the sneakers. On this particular model of 550, the majority of the sneaker is made up of leather but there are mesh panels that will need more attention when cleaning. Use more Sneaker Cleaner on these areas, and dip the Premium Brush into water and scrub in a circular motion. This process may need repeating to lift out the dirt that has embedded itself into material.

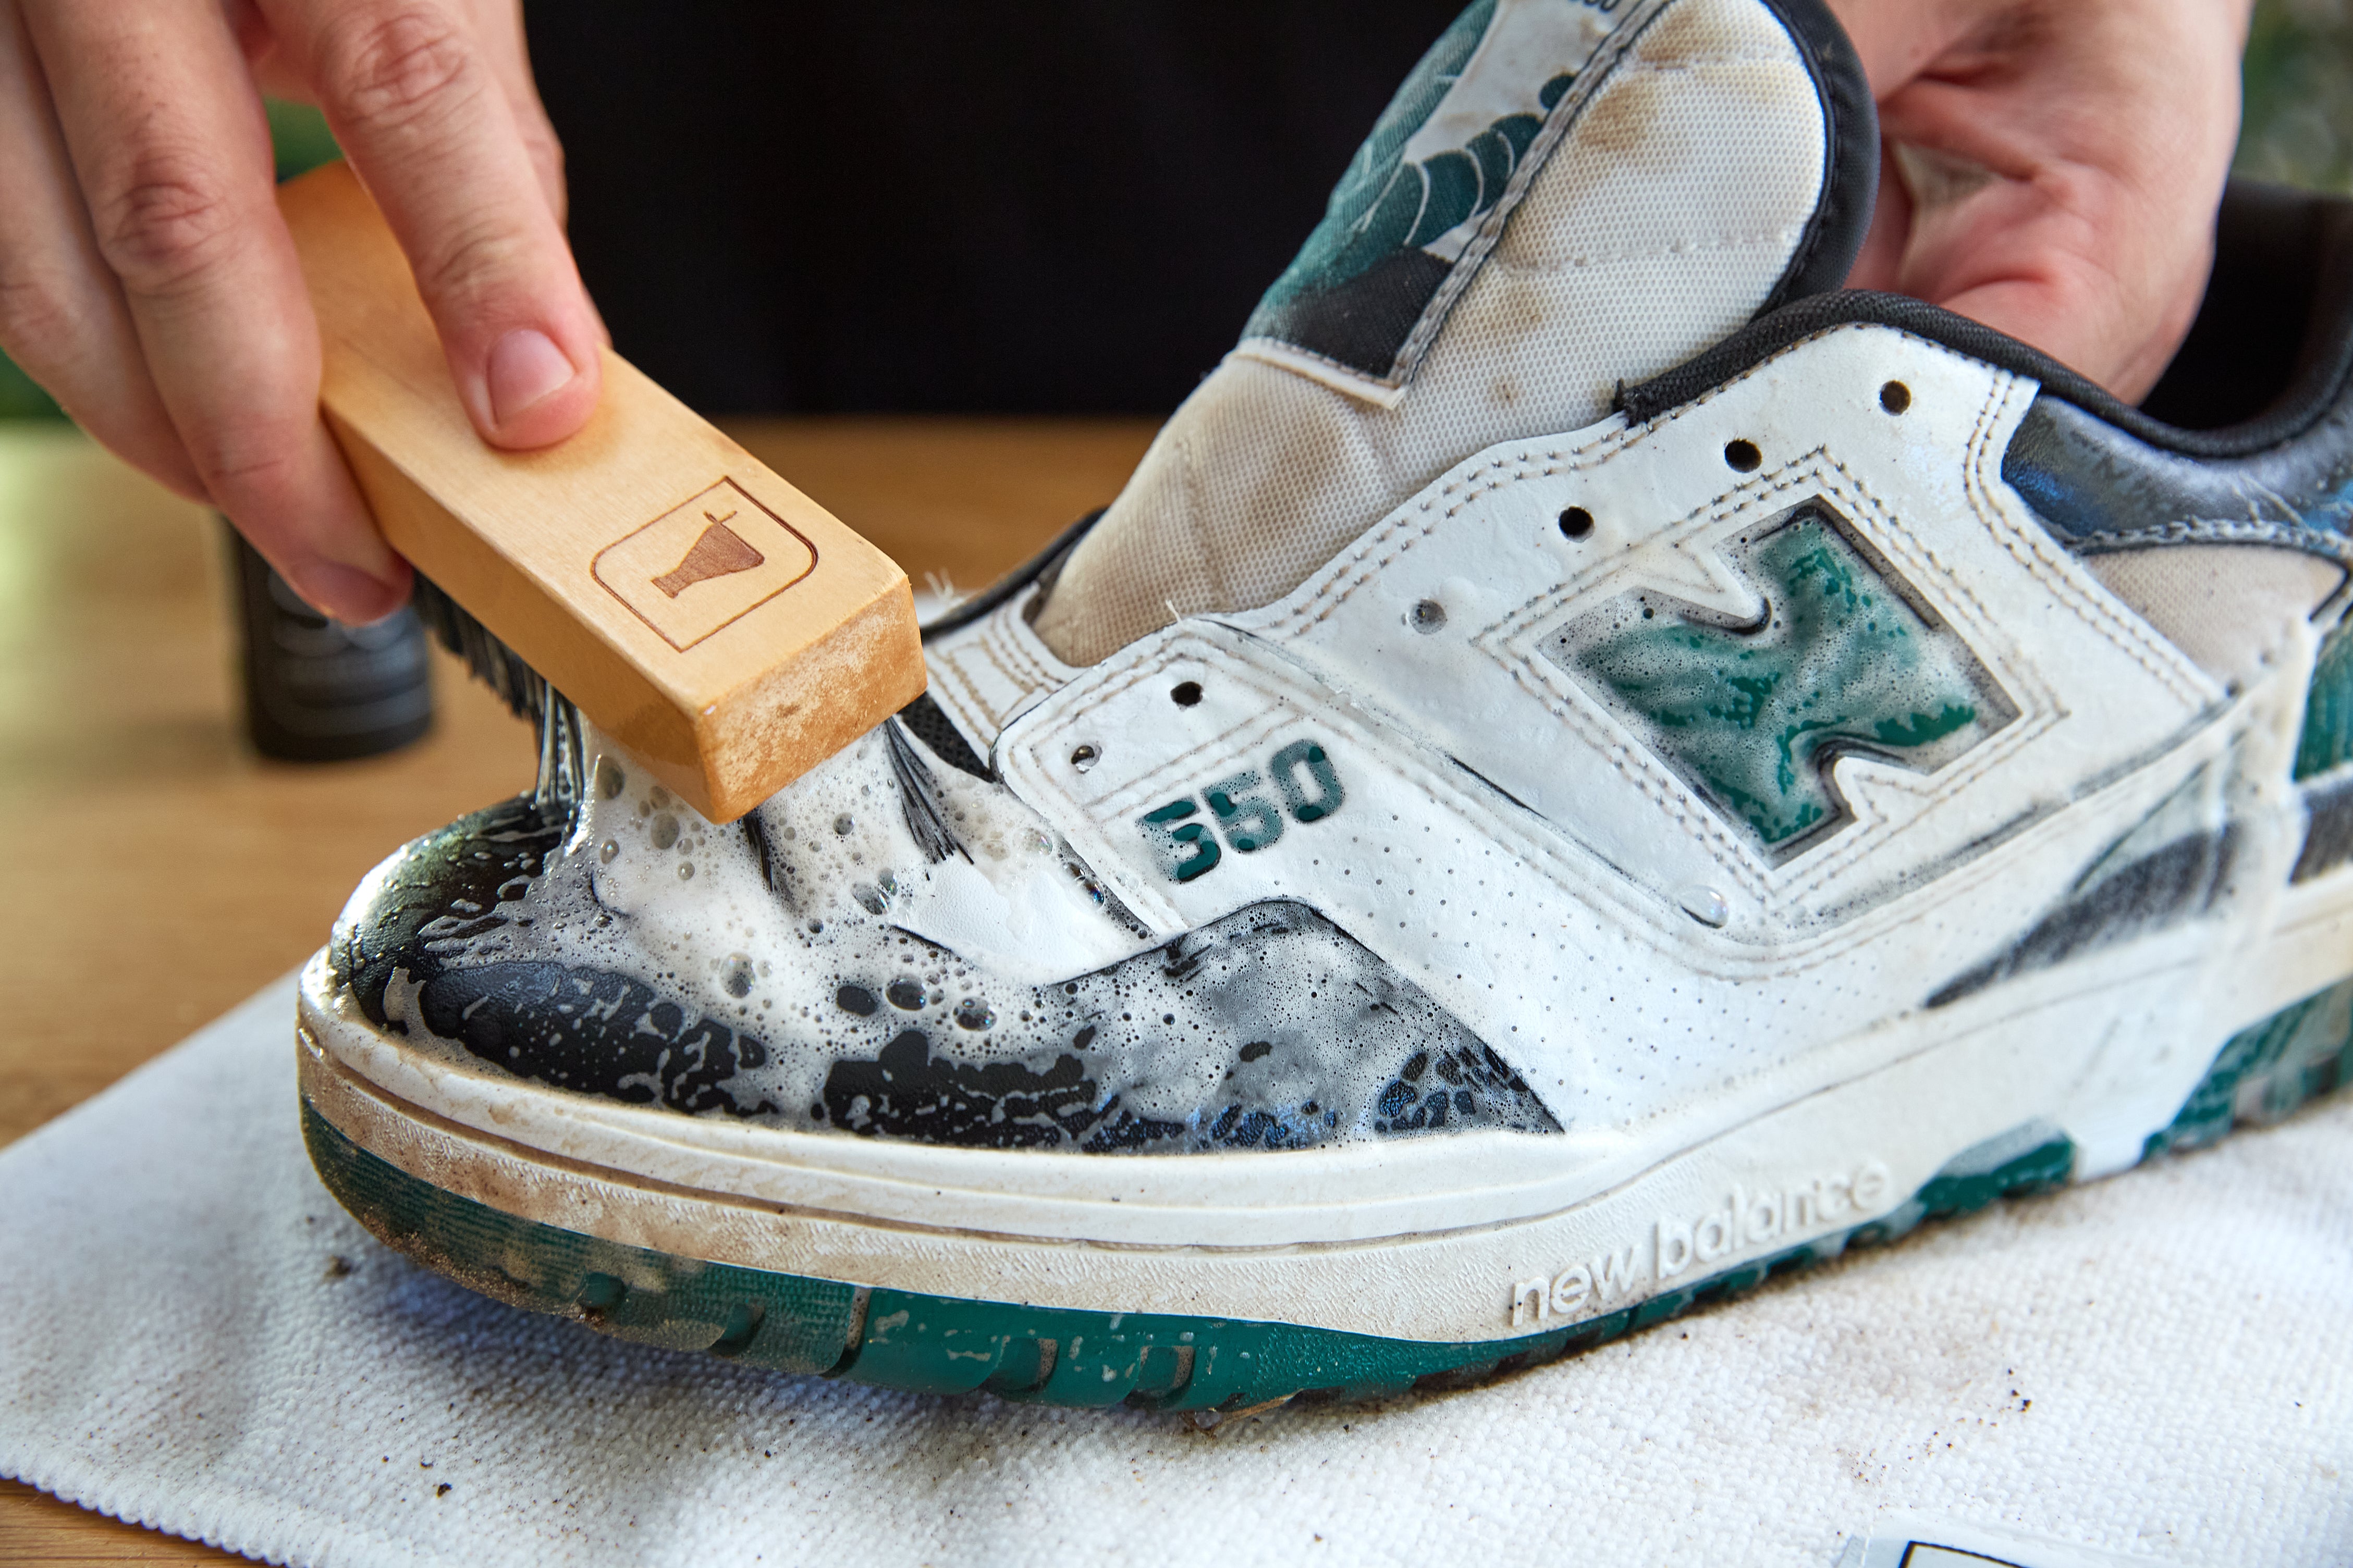
Our Sneaker Cleaner is Environmentally Friendly and Biodegradable.
Step 3:
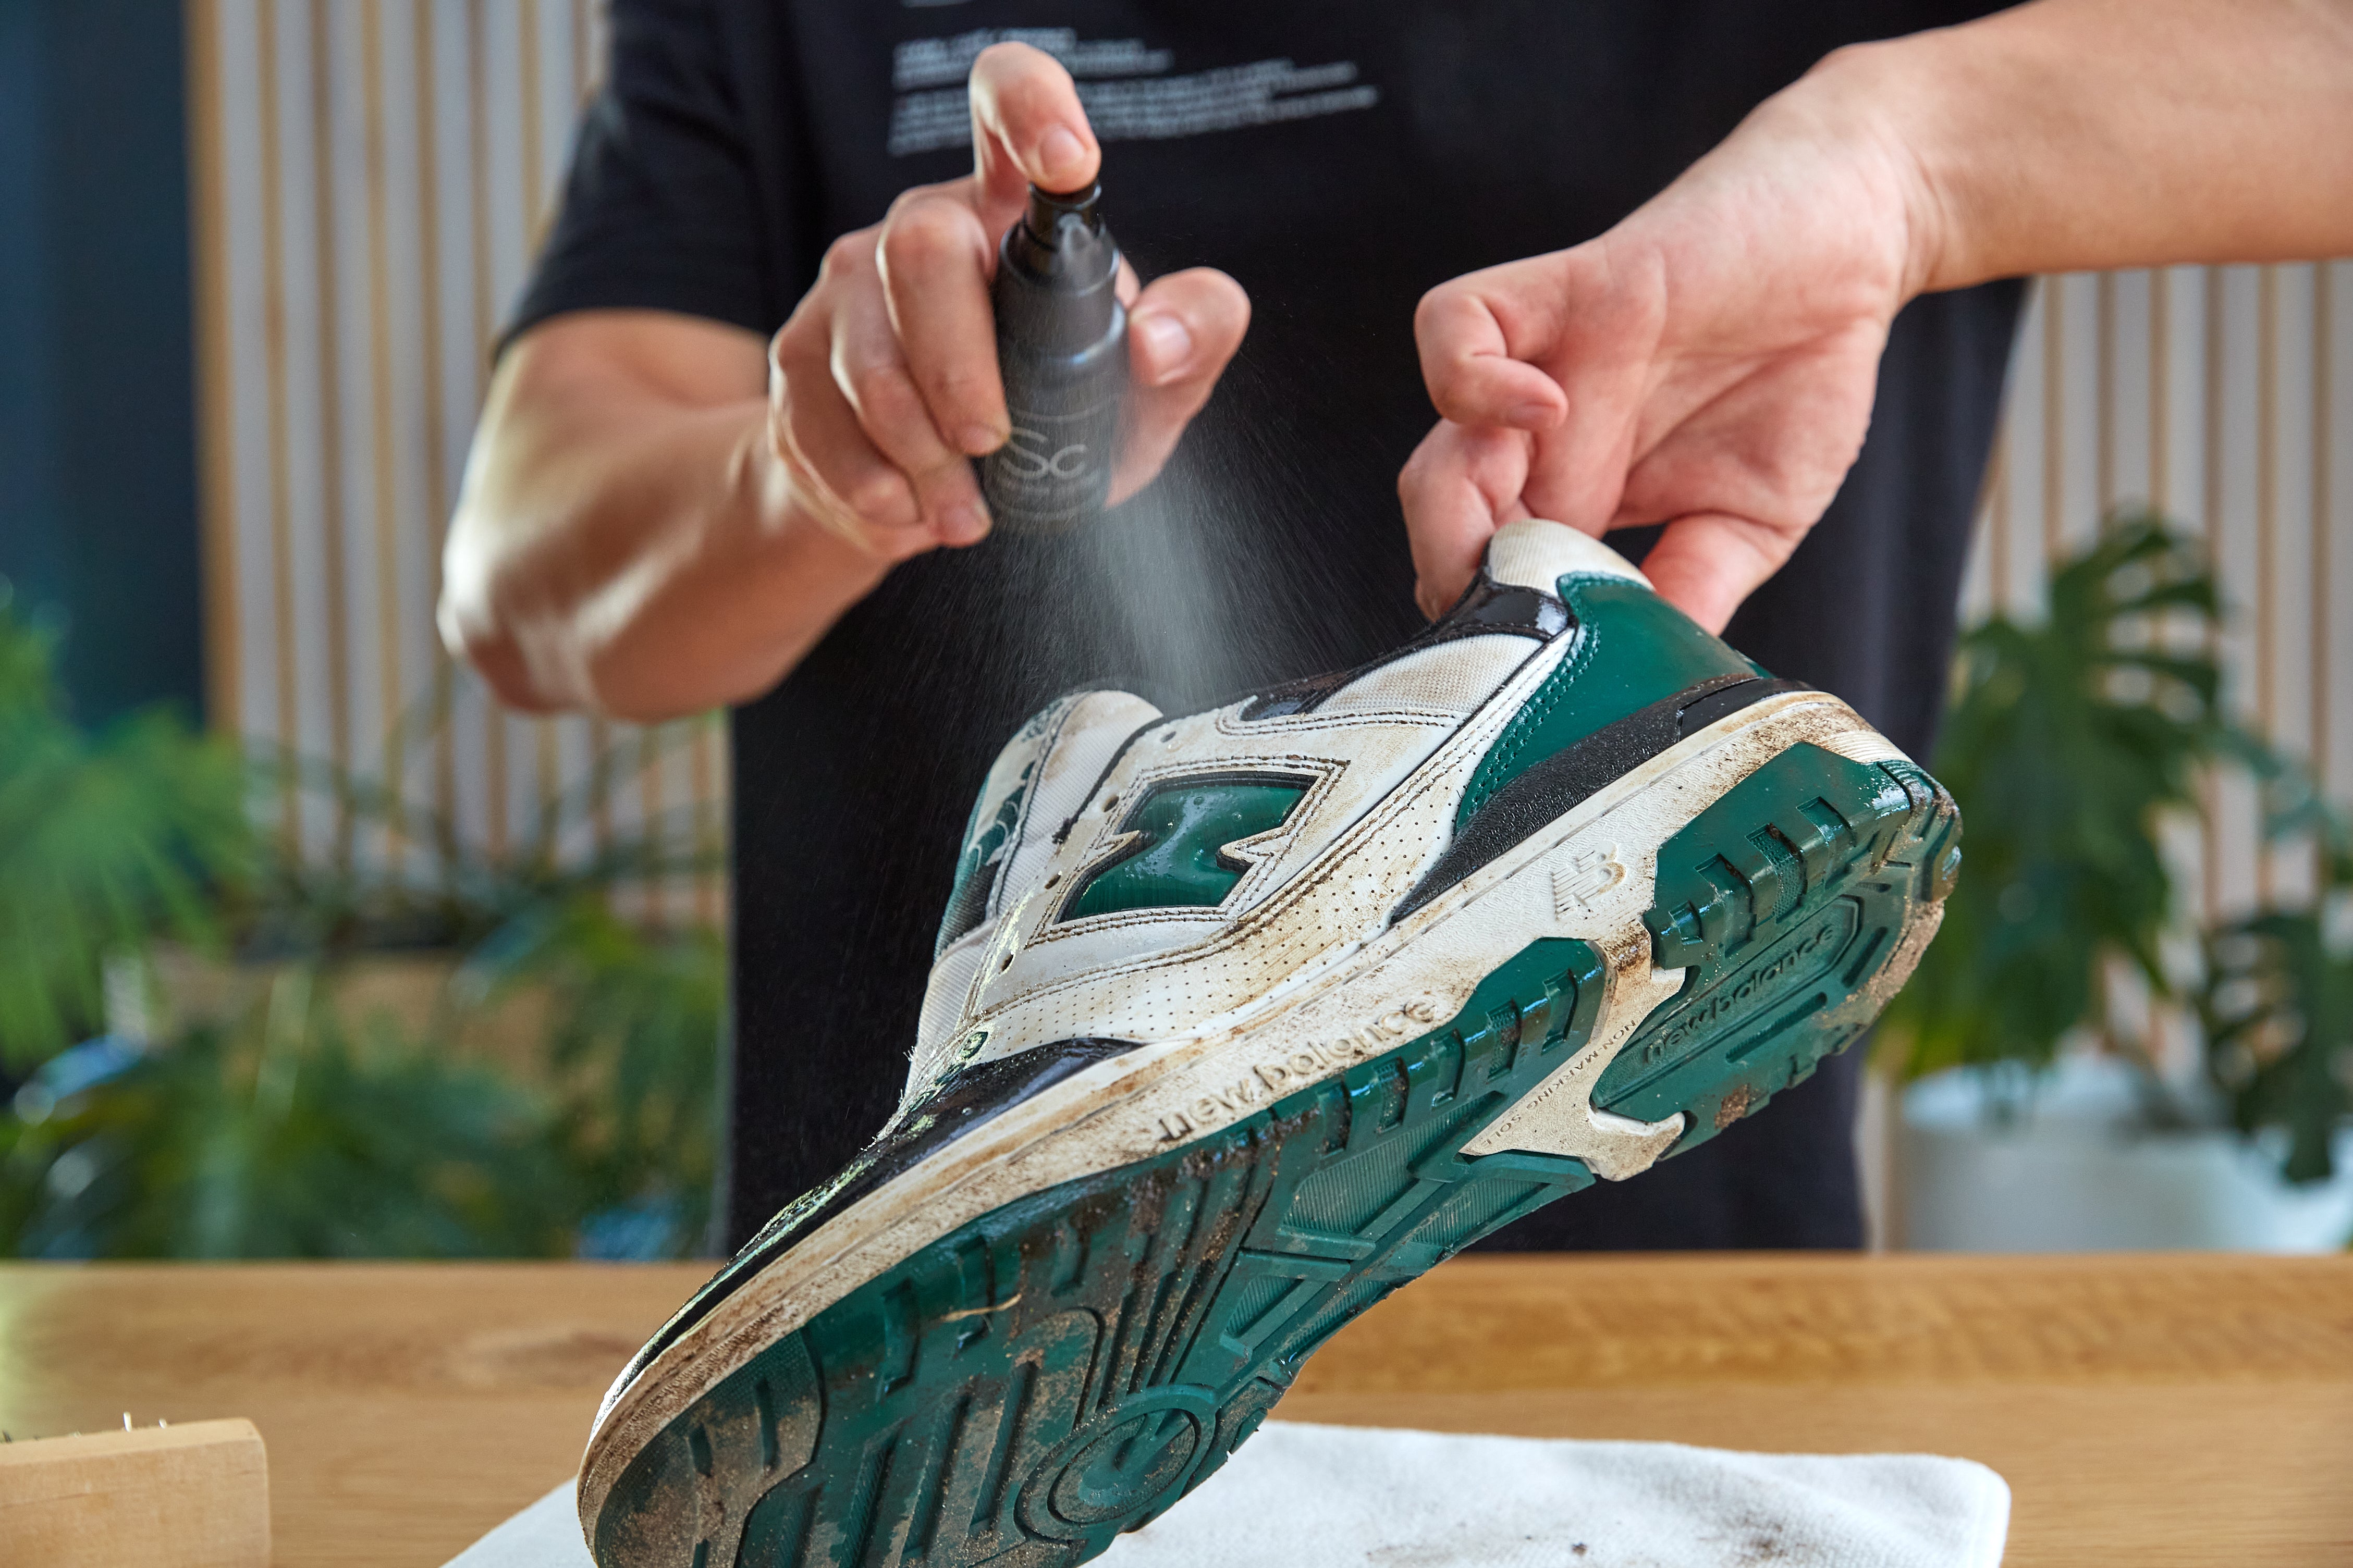
You will then turn your attention to the soles of the sneakers - you can follow the same process as before but can use more force if necessary to remove any stubborn dirt on the soles of the sneakers.
Step 4:
We then used our Sneaker Wipes to do spot cleans and touch ups on those hard to reach places. The wipes provide a convenient way of scrubbing away dirt on materials like mesh.
Step 5:
Use our Microfiber Towel to dry off the excess moisture and the last remaining dirt. Next, you will set your sneakers aside to dry.
Step 6:
Whilst your sneakers are drying, you can start cleaning the laces. You will cup the laces in your hand and spray Sneaker Cleaner onto them. Strat rubbing them together in your hands and then dip into a clean container of water. Continue this process until the dirt is visibly removed. Use a Microfiber Towel to ring out the excess moisture and set aside to dry with your sneakers.
Now the uppers are clean let's go to the next steps.
Step 7:
When your sneakers and laces are dry, you can do your laces up on the sneakers.
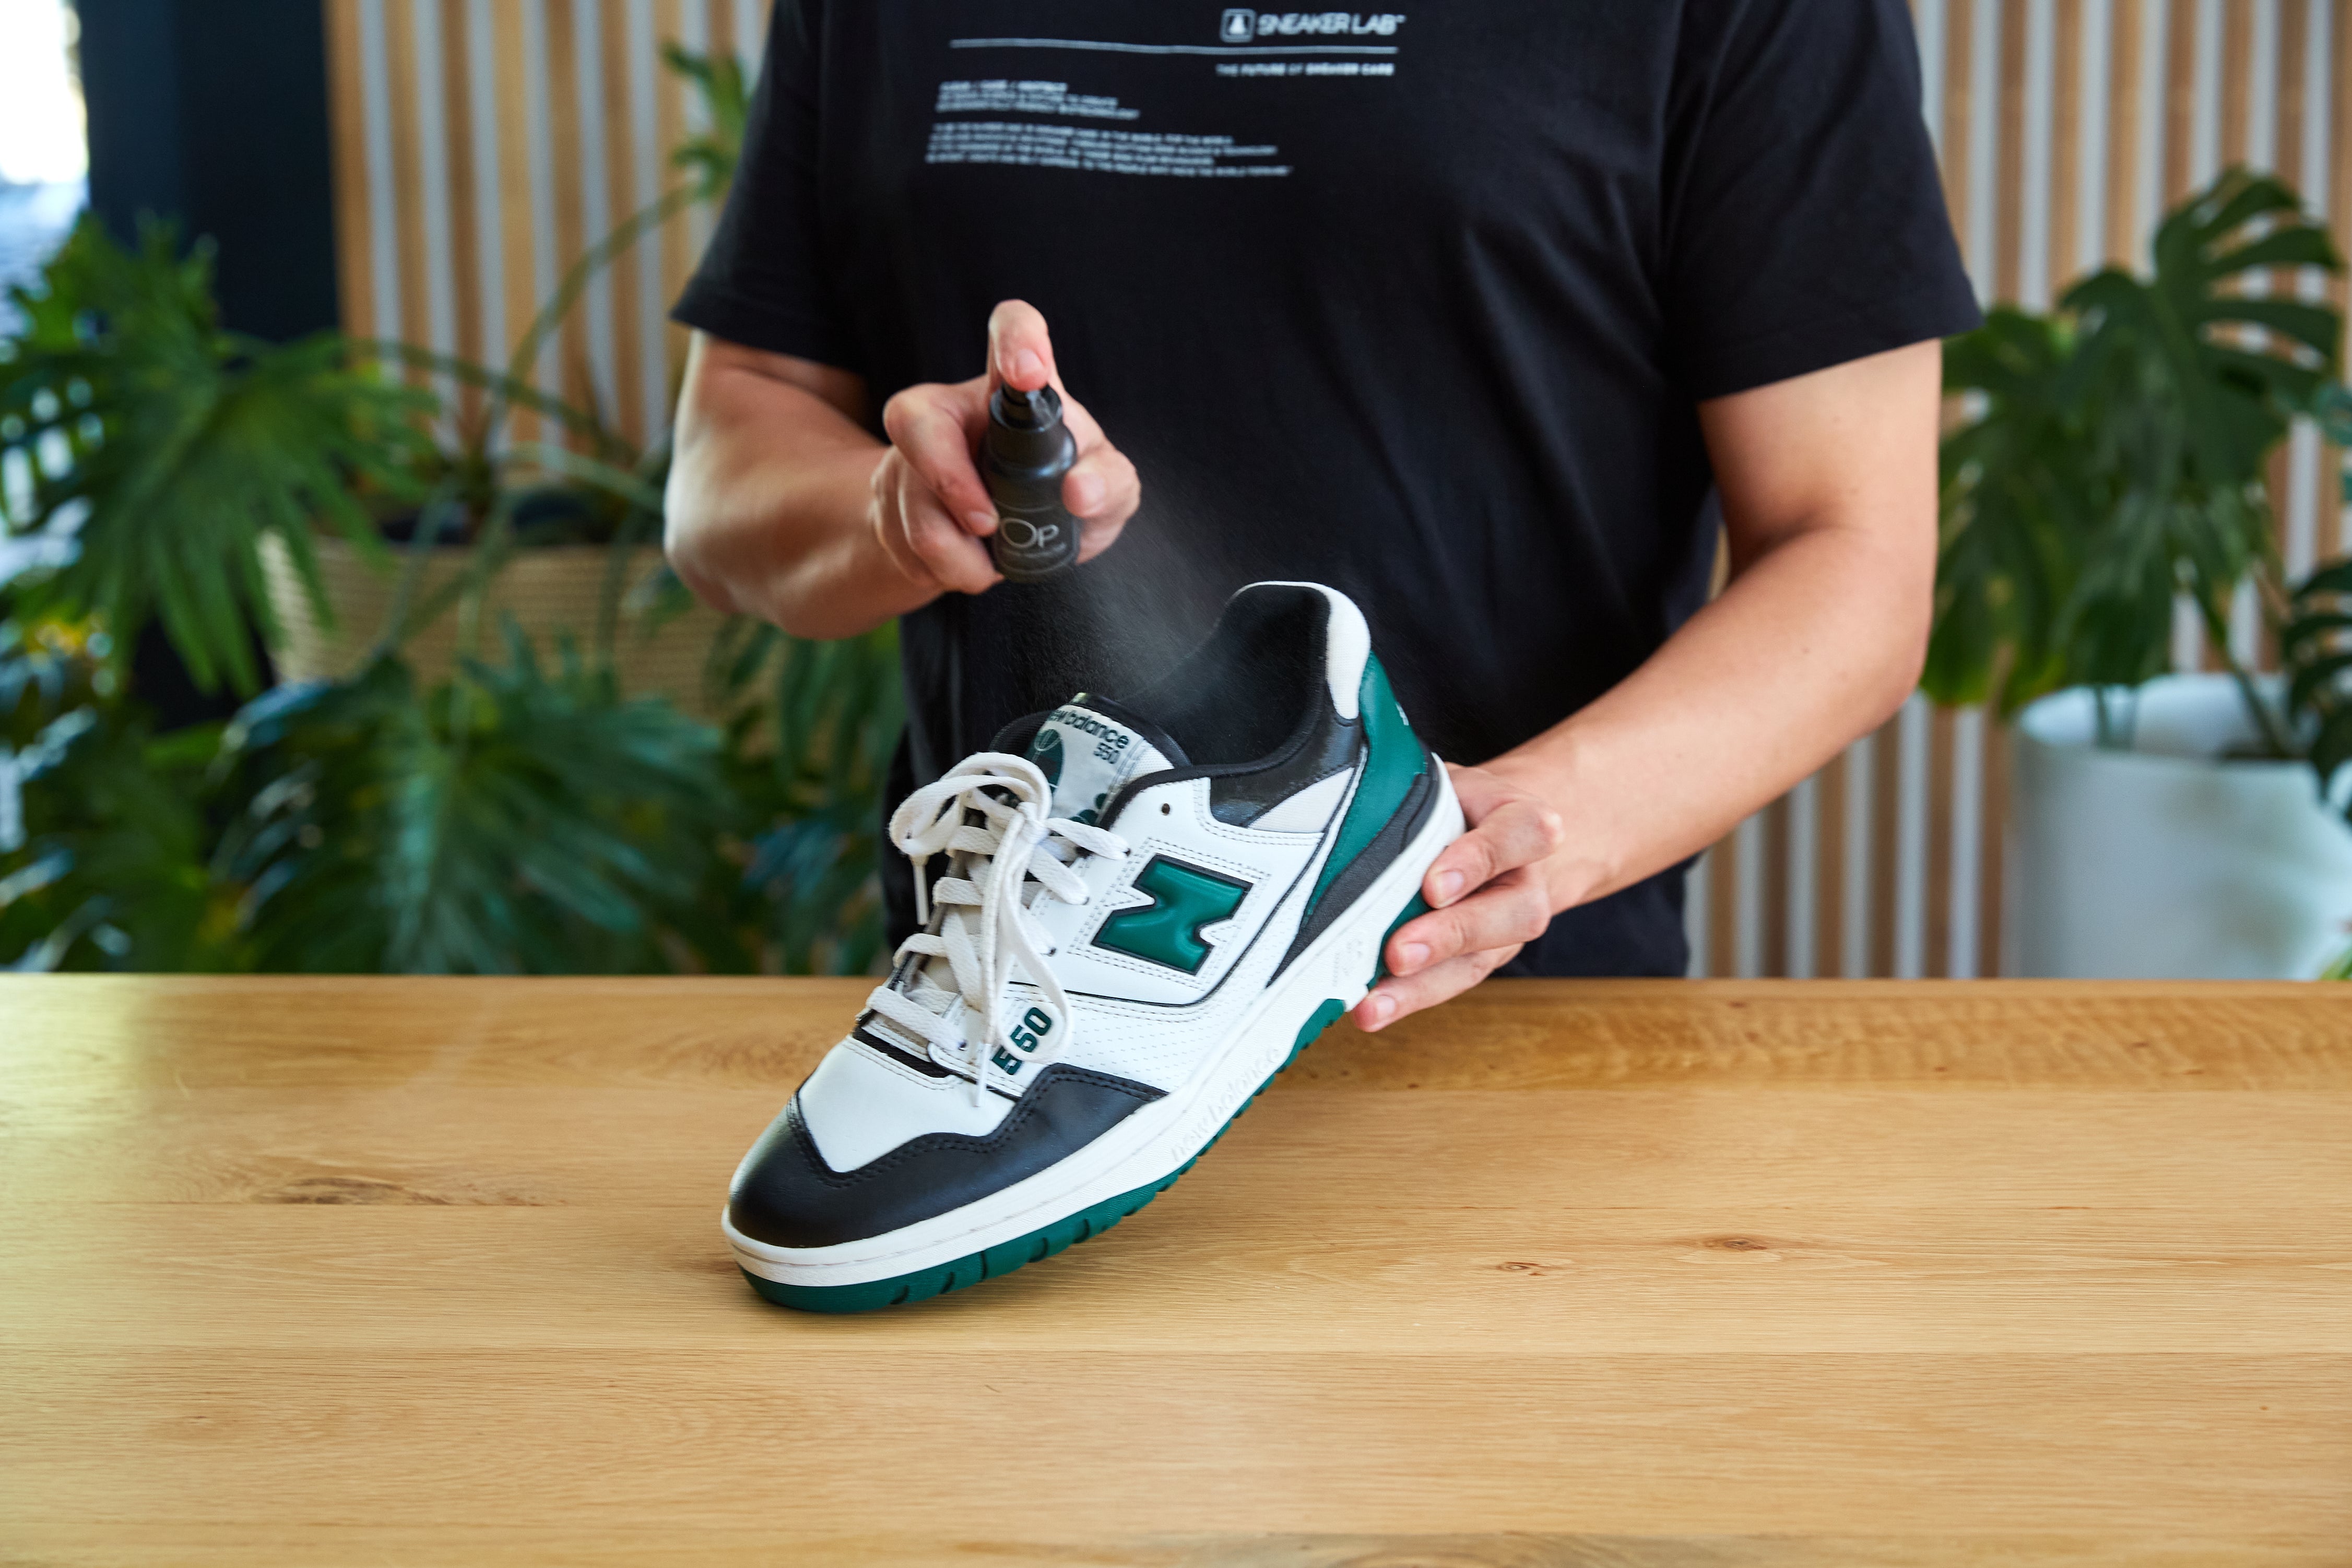
Step 8:
Next we will add our protective products. Firstly, use our Odor Protector to remove unwanted odors and prevent bad bacteria from building. If the inner soles are removable, take them out and spray the inside of the sneaker and the inner soles.
Step 9:
Next, use our Leather Care on the leather sections of this specific 550. If your 550s don't have leather you can skip this step. Leather Care will protect and nourish the leather panels and will prevent cracking.
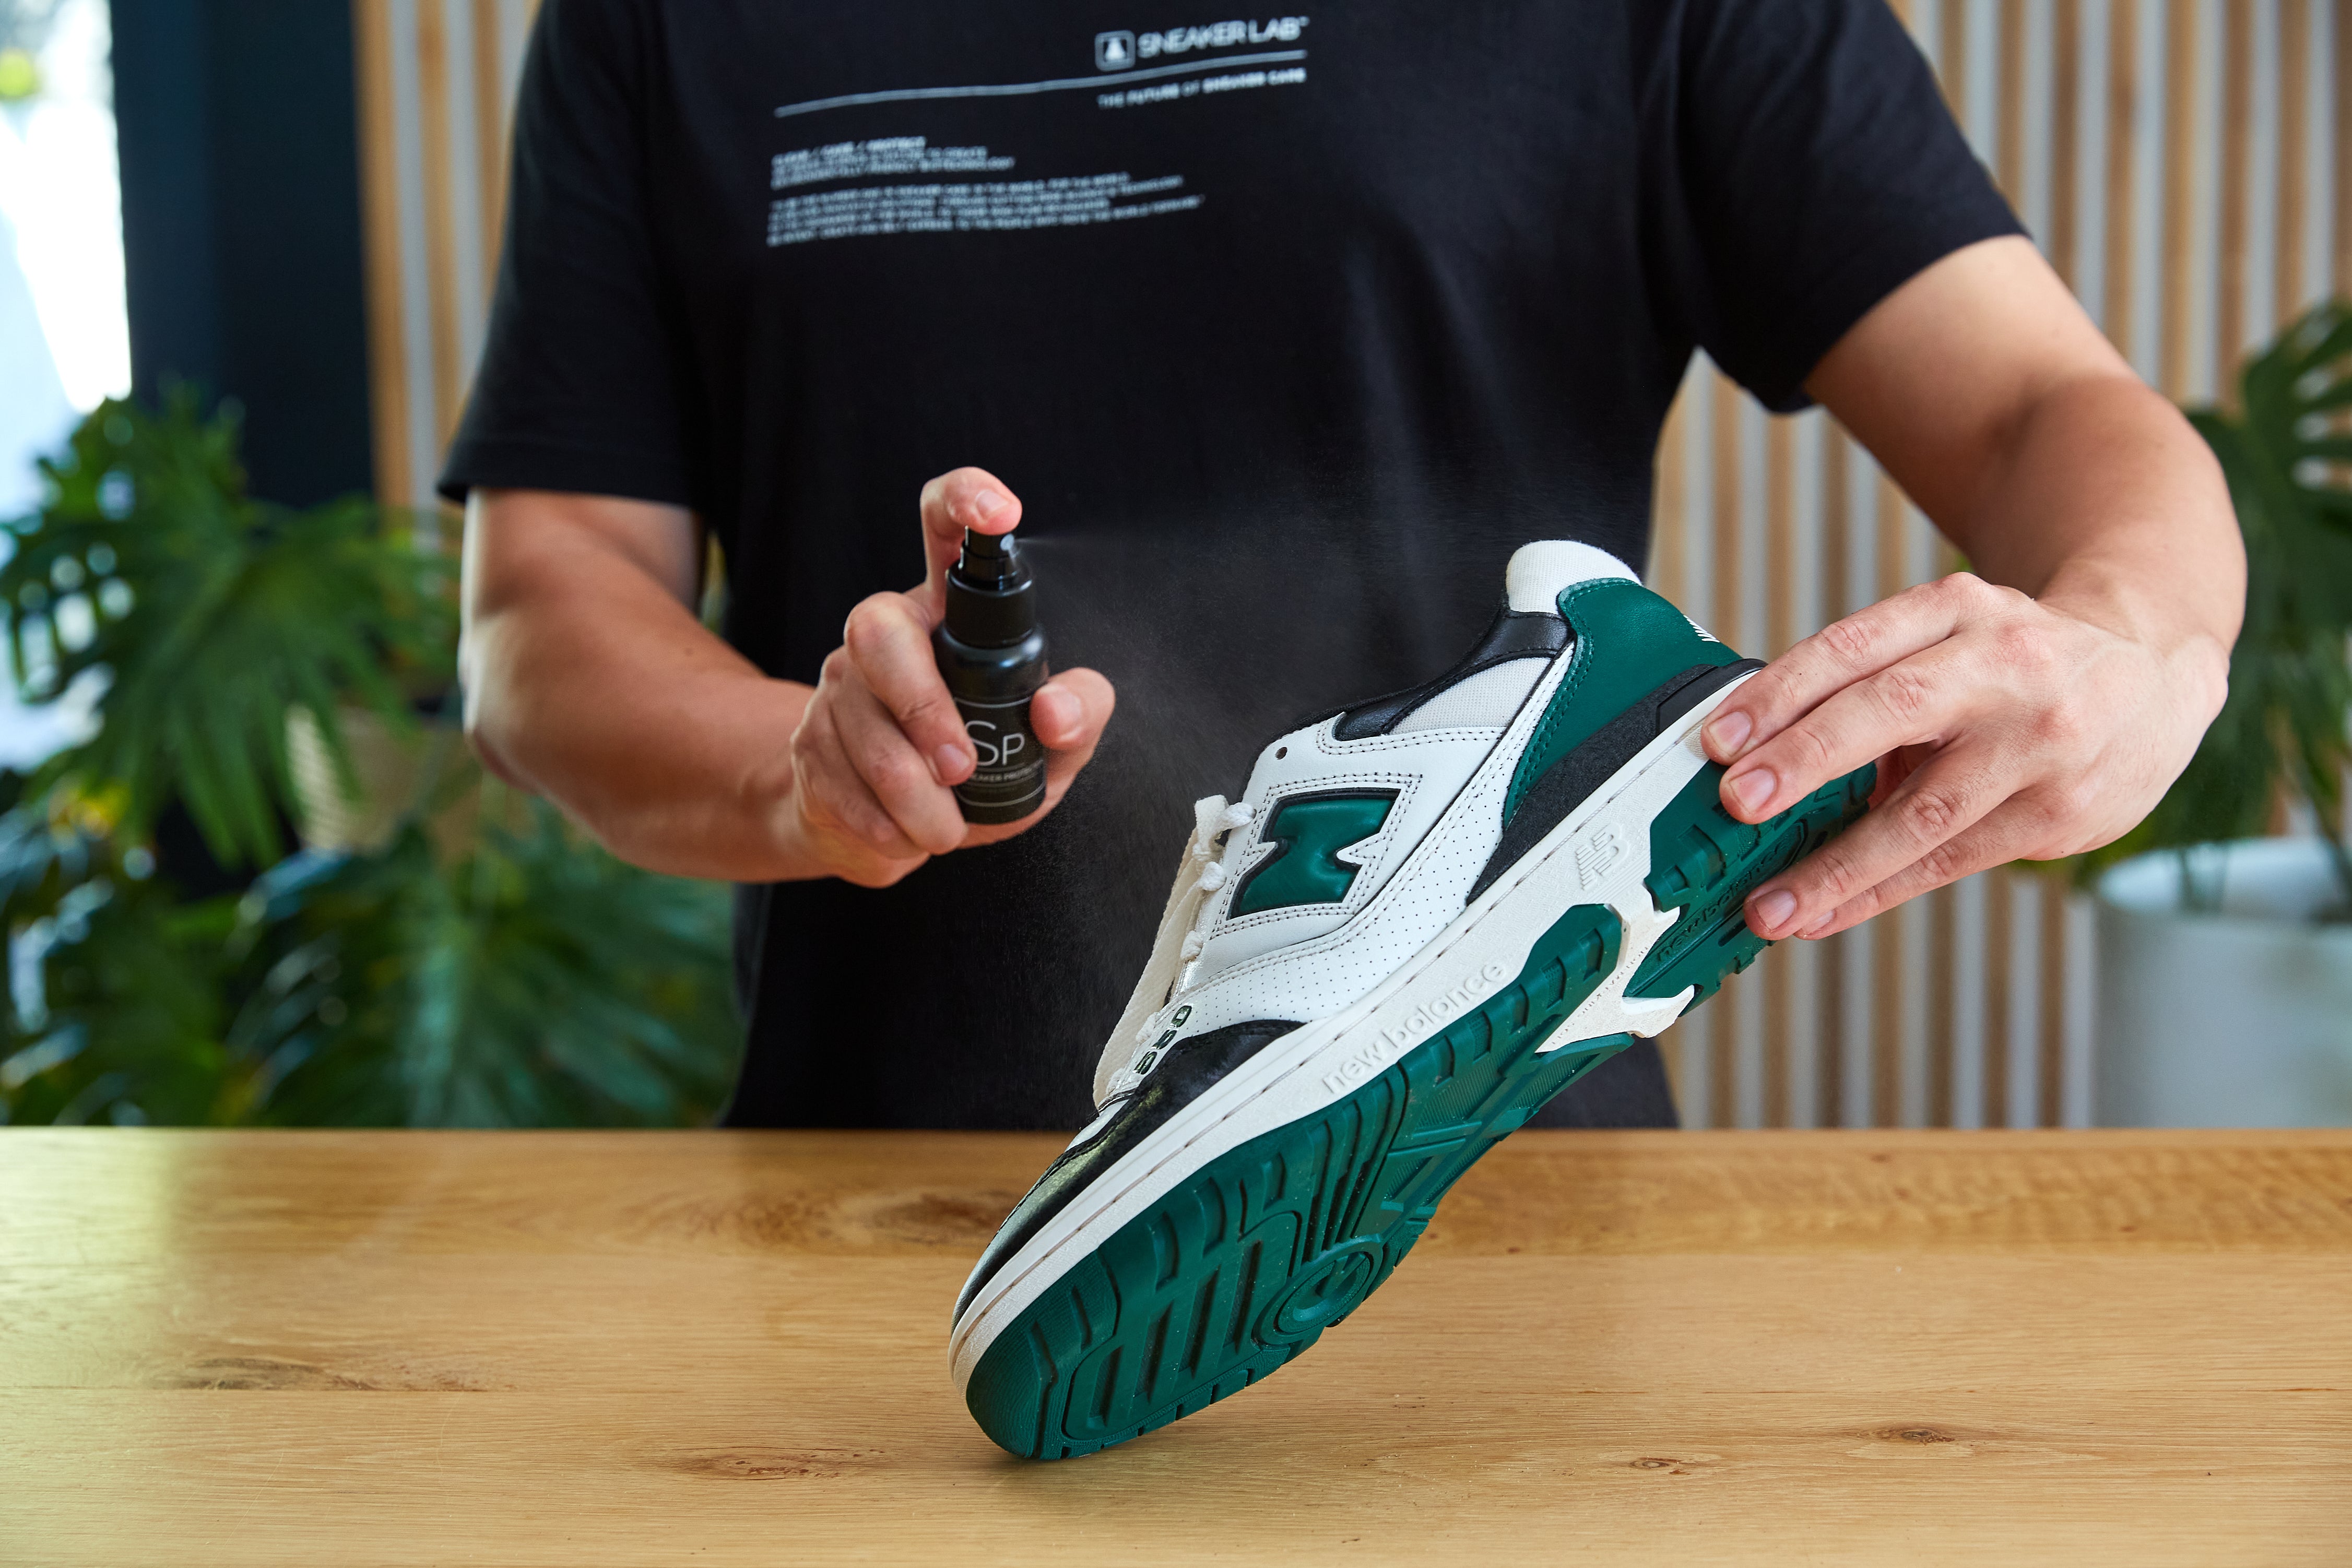
Step 10:
Lastly, you will apply Sneaker Protector to the mesh, tongue and laces of the sneakers to create an invisible barrier against dirt and stains. This will also make cleaning easier in the future as it will prevent dirt from setting in.
Step 11:
Wear your shoes!
When your sneakers and laces are dry, you can do your laces up on the sneakers.
Step 8:
Next we will add our protective products. Firstly, use our Odor Protector to remove unwanted odors and prevent bad bacteria from building. If the inner soles are removable, take them out and spray the inside of the sneaker and the inner soles.
Step 9:
Next, use our Leather Care on the leather sections of this specific 550. If your 550s don't have leather you can skip this step. Leather Care will protect and nourish the leather panels and will prevent cracking.
Step 10:
Lastly, you will apply Sneaker Protector to the mesh, tongue and laces of the sneakers to create an invisible barrier against dirt and stains. This will also make cleaning easier in the future as it will prevent dirt from setting in.
Step 11:
Wear your shoes!
[ Follow ]