How To Clean Nike Dunk Low
[ How To ]
Article
 Play video
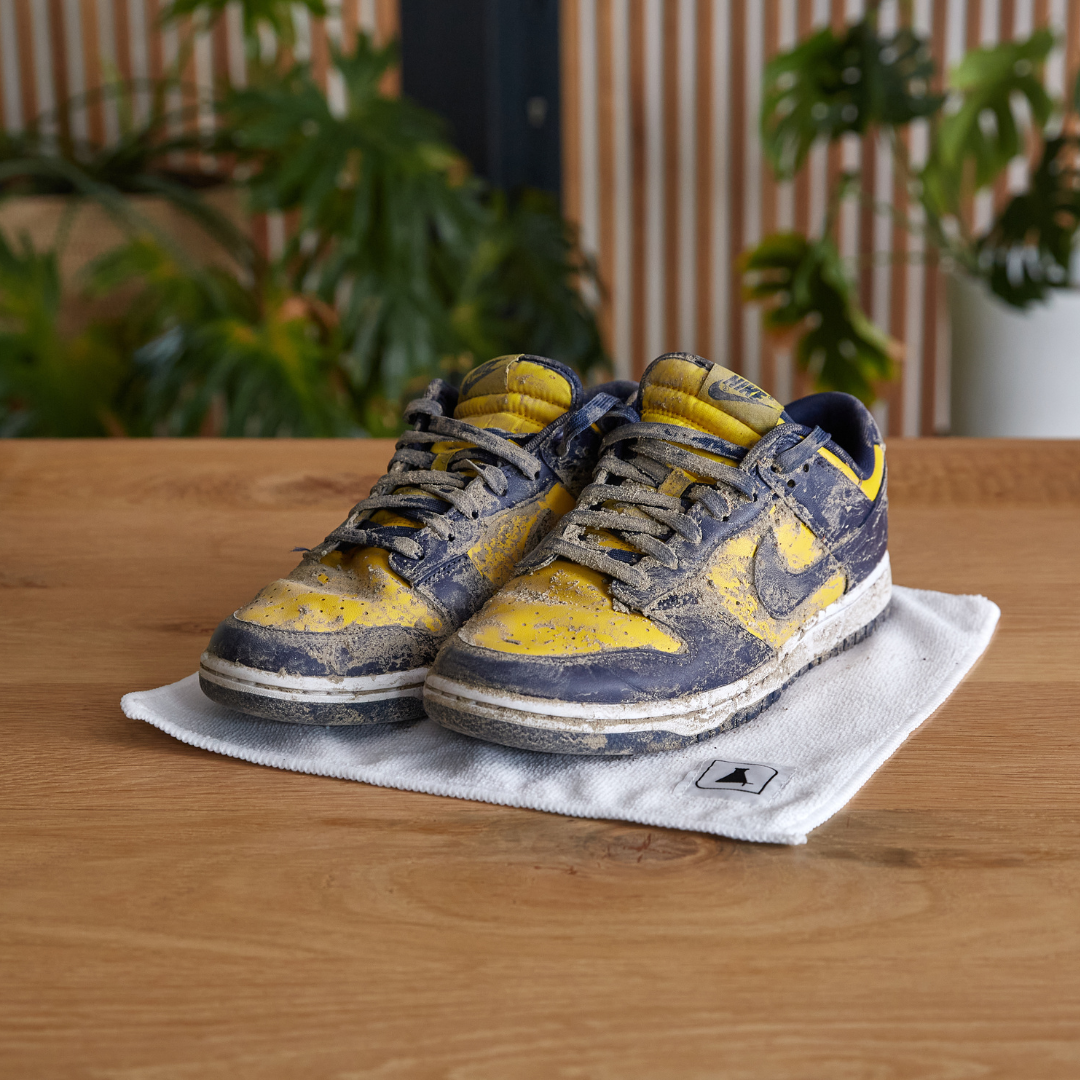
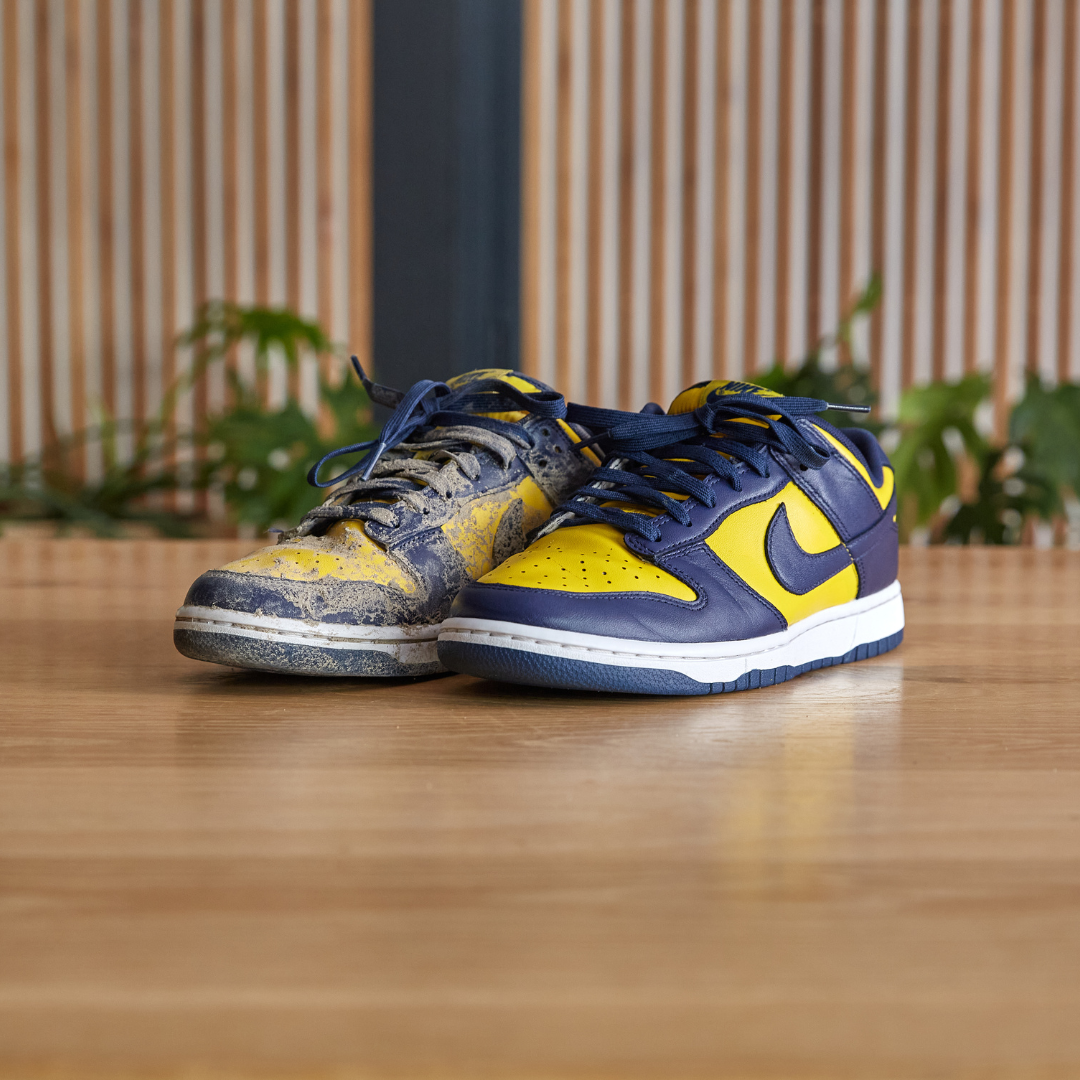
One of our colleagues at Sneaker LAB managed to get their Nike Dunk Lows extremely dirty over the weekend and we decided to document how we got them looking clean and fresh again as well as showing you how to protect them from getting dirty again.
The Nike Dunk saw a huge resurgence in 2020 with the silhouette becoming extremely popular globally. The Dunks became a go to and could be seen absolutely everywhere. The Dunk is still going strong with new and exciting colorways being launched and multiple re-releases happening for the most popular colorways... especially the Nike Dunk Panda.
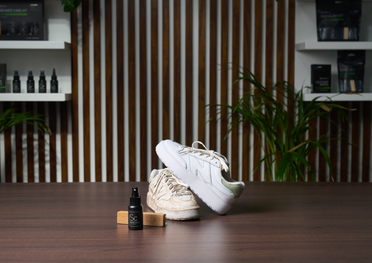
Today we will be cleaning the Nike Dunk Michigan and the products used can be found in our Premium Kit along with our Leather Care. The Premium Kit consists of our Sneaker Cleaner, Sneaker Protector, Odor Protector and Premium Brush.
Today we will be cleaning the Nike Dunk Michigan and the products used can be found in our Premium Kit along with our Leather Care. The Premium Kit consists of our Sneaker Cleaner, Sneaker Protector, Odor Protector and Premium Brush.

Step 1:
Prepare your Dunks for a deep clean by removing the laces of the sneakers and set them aside. Then grab our Premium Brush and dry brush off any excess dirt that is on the surface of the sneaker. This will make the cleaning process a whole lot easier.
Prepare your Dunks for a deep clean by removing the laces of the sneakers and set them aside. Then grab our Premium Brush and dry brush off any excess dirt that is on the surface of the sneaker. This will make the cleaning process a whole lot easier.
Step 2:
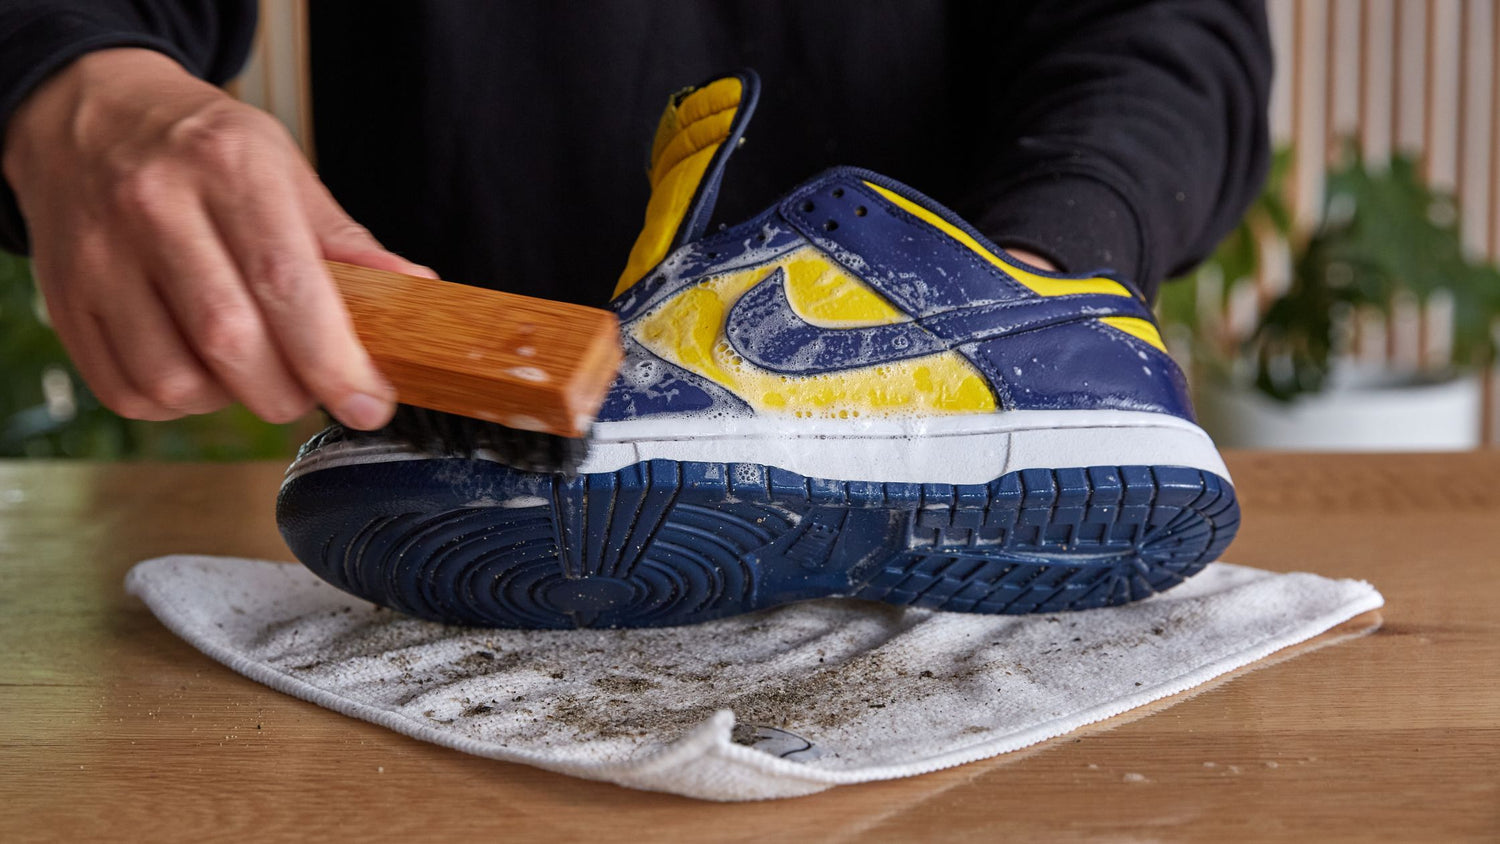
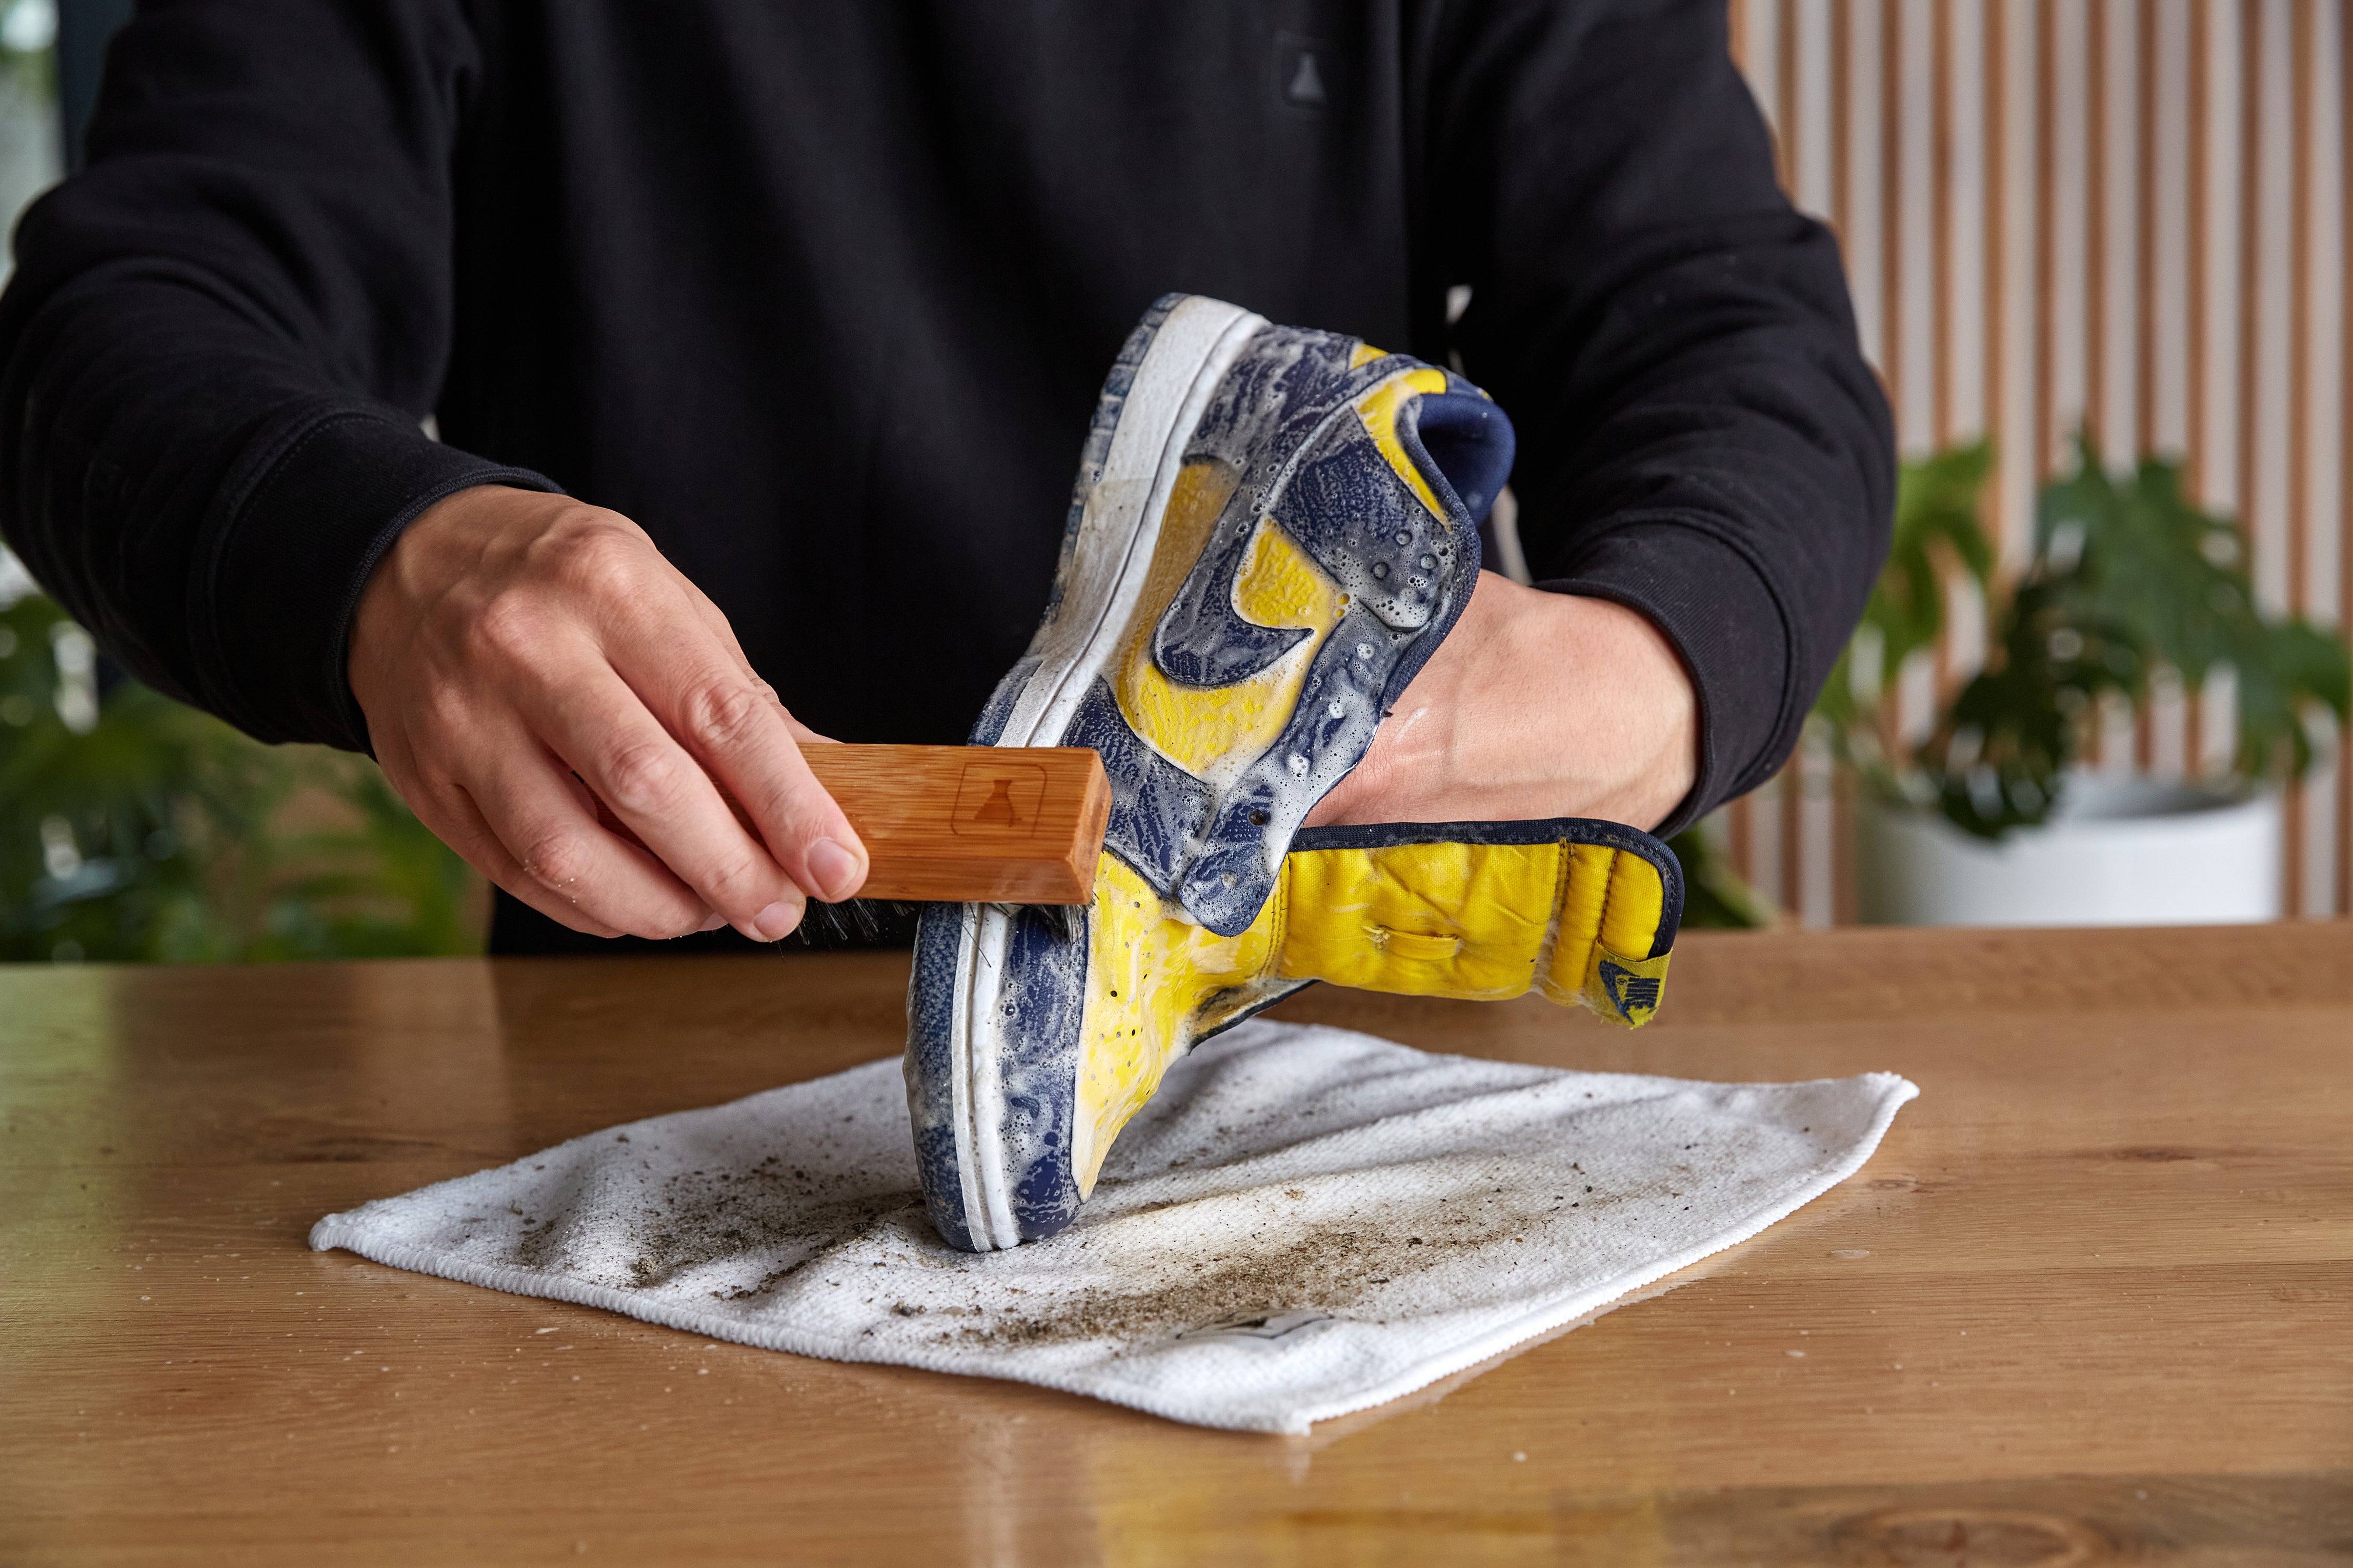
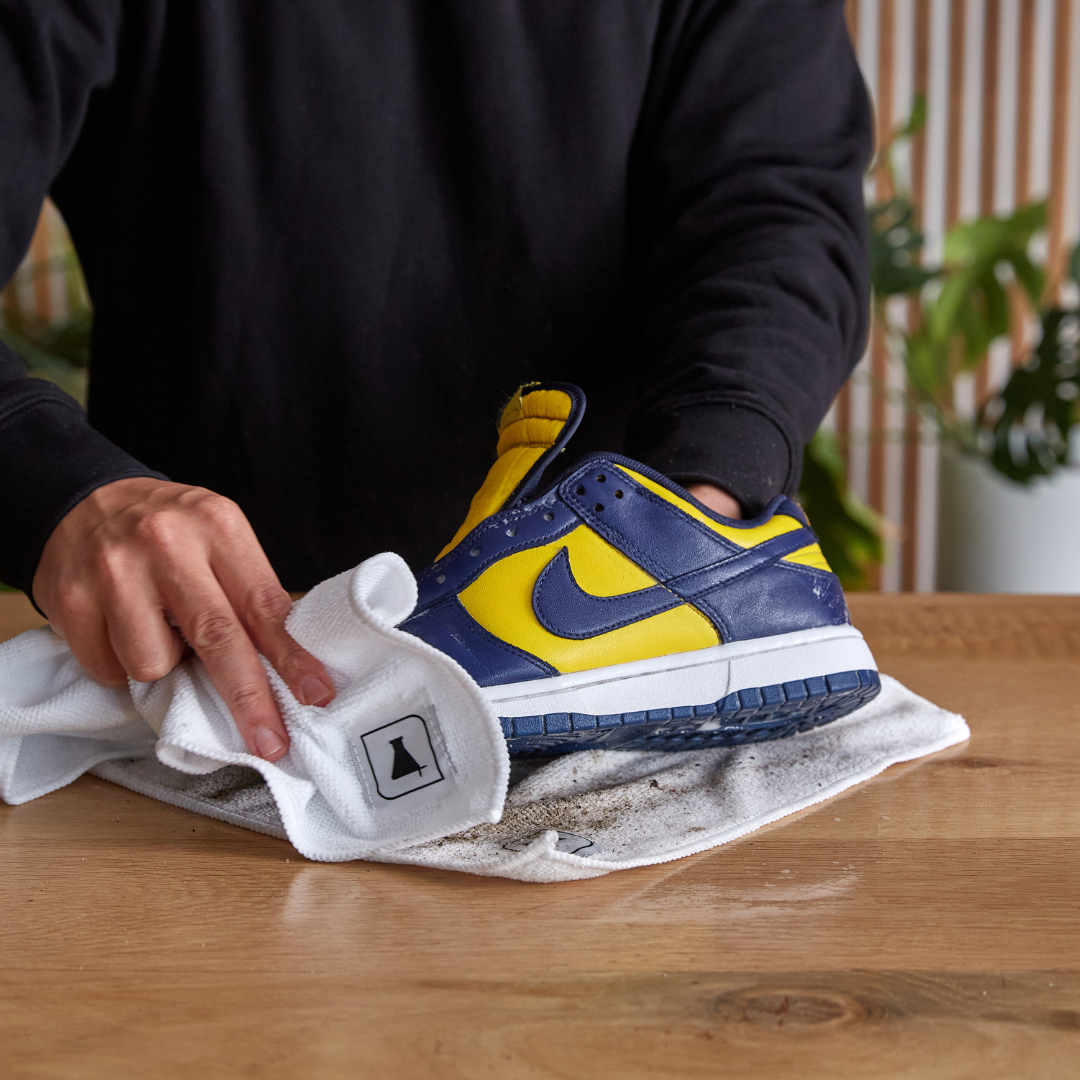
Use our Sneaker Cleaner and spray generously around the uppers of the sneaker and focus on the most heavily dirtied areas. Next, get a container of clean water, dip our Premium Brush into the water and then scrub in a circular motion. The Sneaker Cleaner and the water will interact to create a foam and lift off the dirt from the sneaker. Use a Microfiber Towel to wipe off the dirt and excess moisture. Since the upper of this Dunk is leather, the dirt should be removed quite easily. You may have to pay more attention to the tongue of the sneaker as the material used will hold onto dirt more than leather.
Use our Sneaker Cleaner and spray generously around the uppers of the sneaker and focus on the most heavily dirtied areas. Next, get a container of clean water, dip our Premium Brush into the water and then scrub in a circular motion. The Sneaker Cleaner and the water will interact to create a foam and lift off the dirt from the sneaker. Use a Microfiber Towel to wipe off the dirt and excess moisture. Since the upper of this Dunk is leather, the dirt should be removed quite easily. You may have to pay more attention to the tongue of the sneaker as the material used will hold onto dirt more than leather.

Step 3:
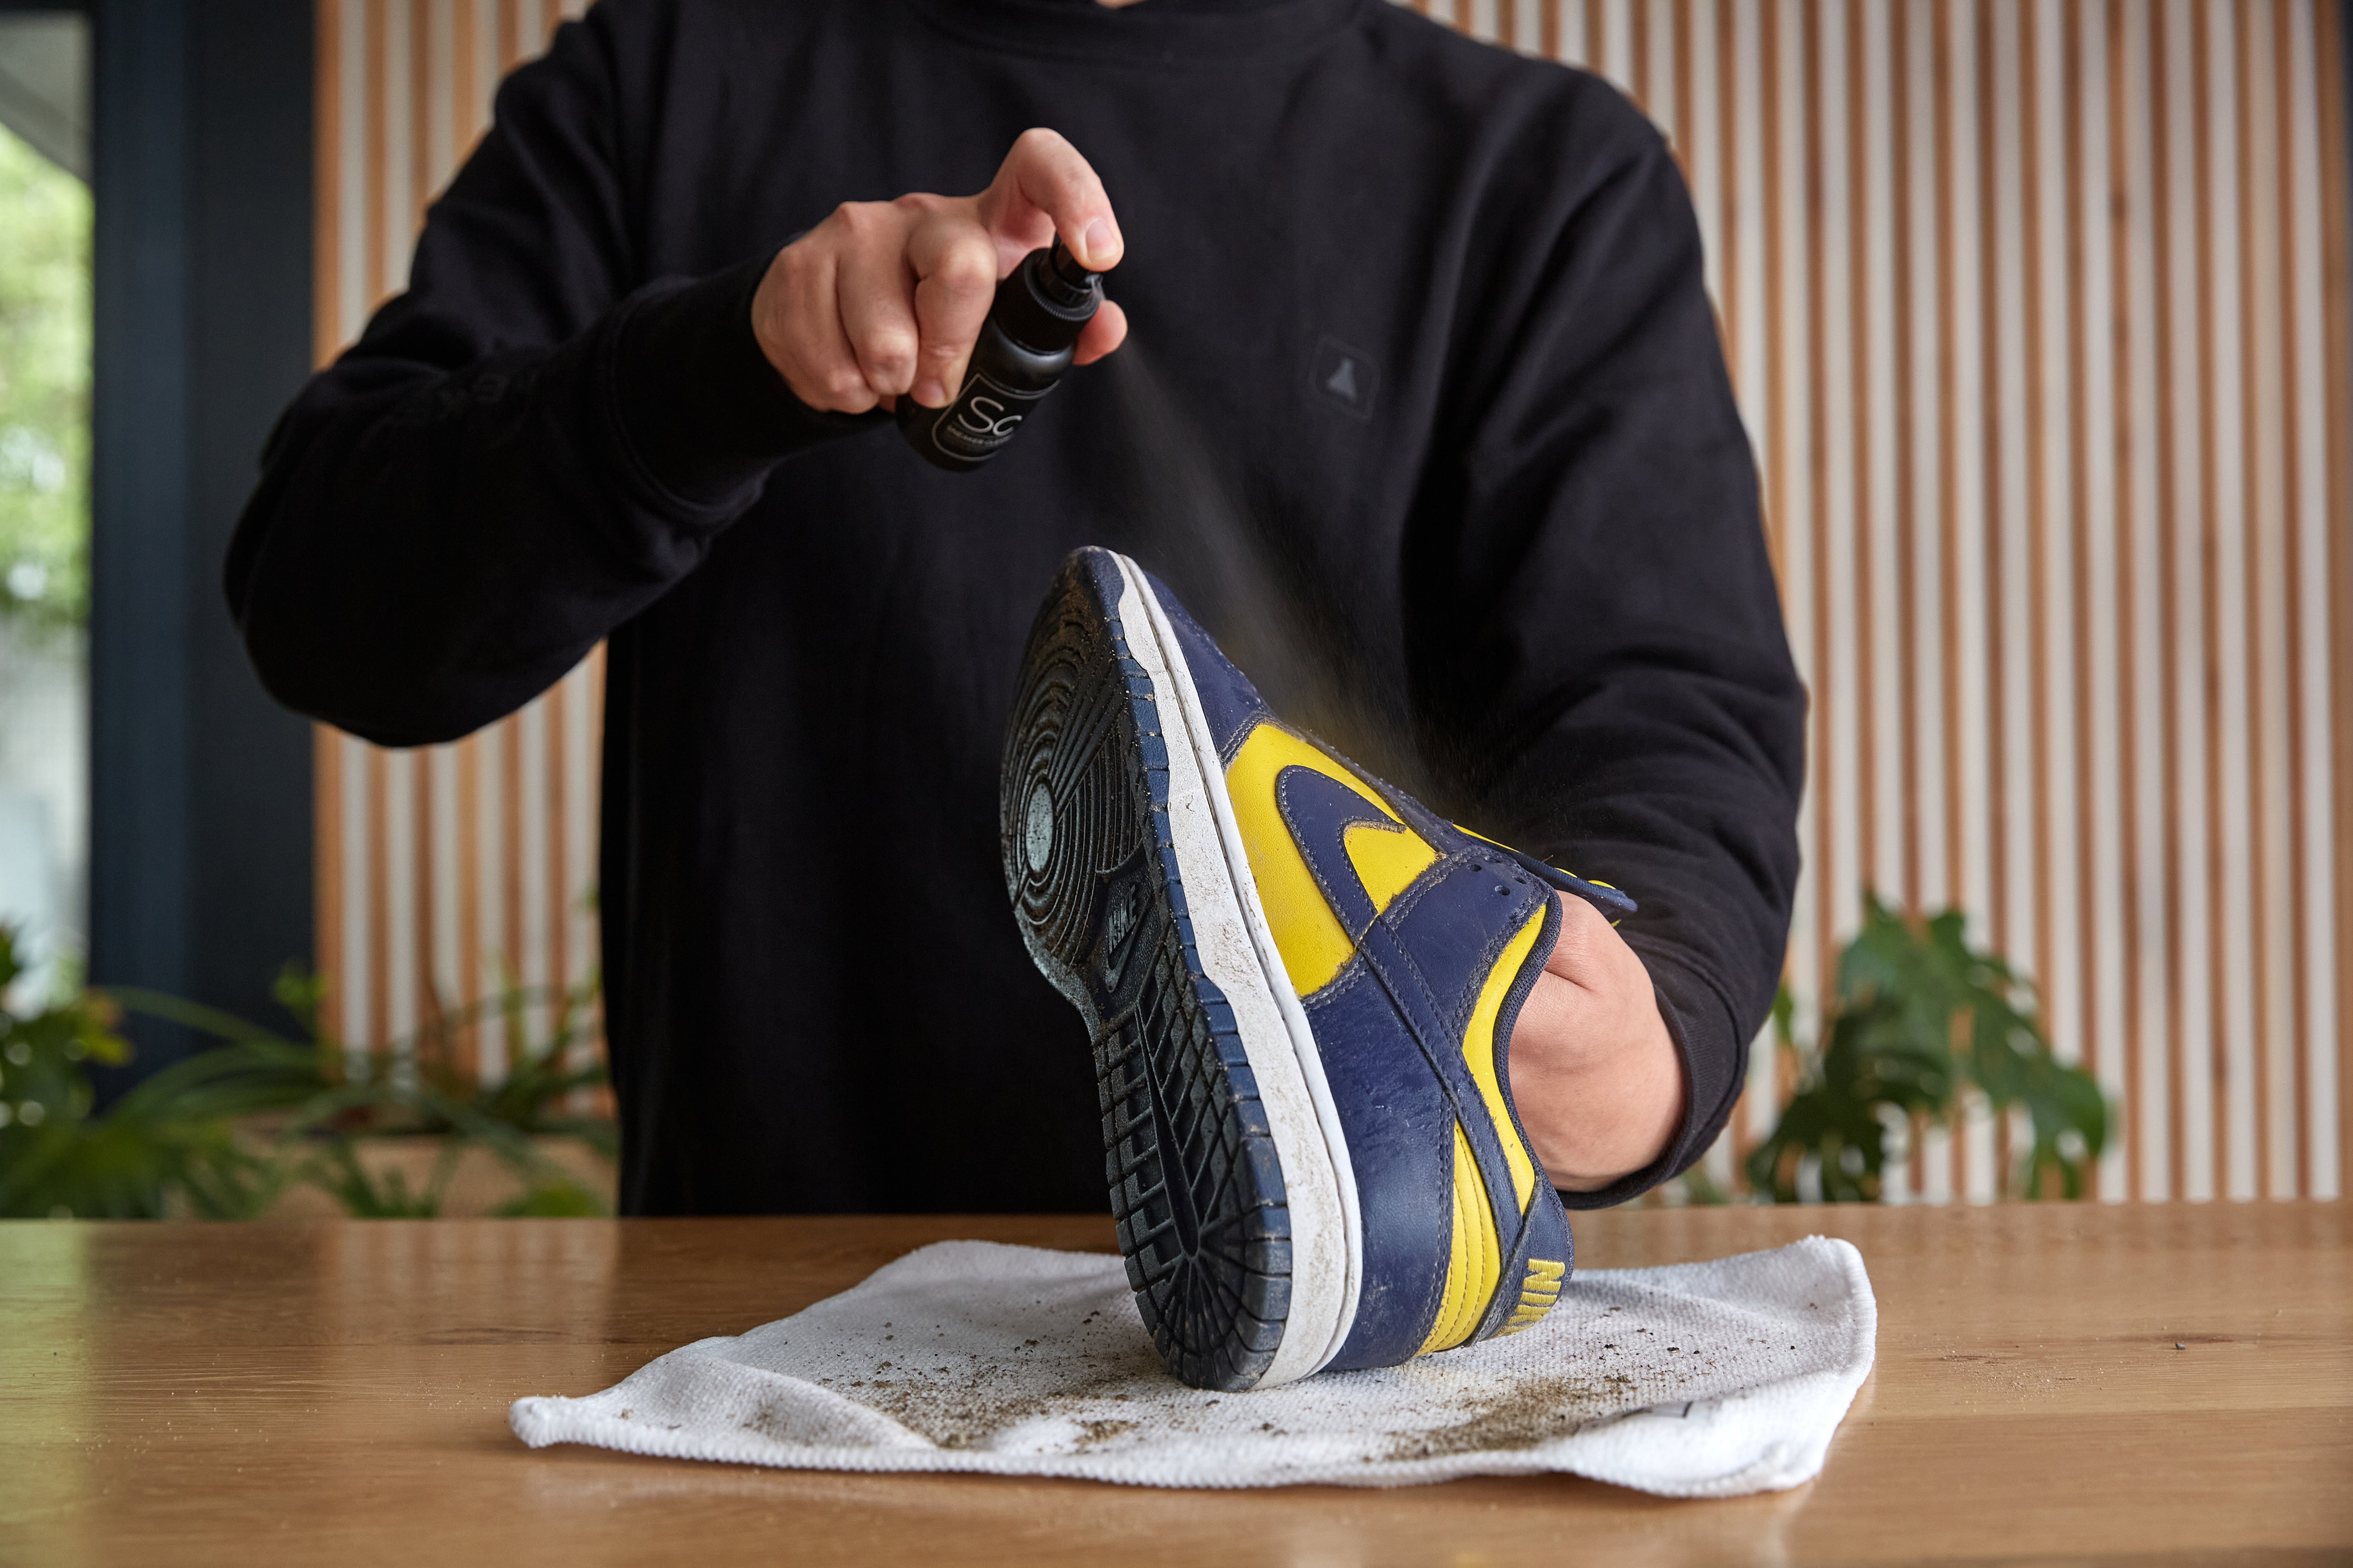
Follow the same process as above for the soles of the sneakers. You may have to apply more pressure when scrubbing as it will be more difficult to remove dirt from the soles.
Step 4:
Once all dirt has been removed, wipe down the sneakers with a Microfiber Towel and set aside to dry.
Step 5:
You will turn your attention to cleaning the laces now. Cup the laces in your hand, spray a generous amount of Sneaker Cleaner onto the laces and then rub together in your hands. Then dip the laces into a clean container of water and contain rubbing together in your hands. When clean, ring out the excess moisture in the laces and set aside to dry.
Step 6:
Once the sneakers and the laces are clean, lace up your sneakers and prepare to add the protective products to keep them looking and feeling fresh for longer.
Step 7:
Use our Odor Protector to remove unwanted odors from your sneakers and to prevent a build up of bad bacteria forming in your sneakers. Spray this inside the sneaker and also on the inner sole if it is removable. Leave to dry over night.
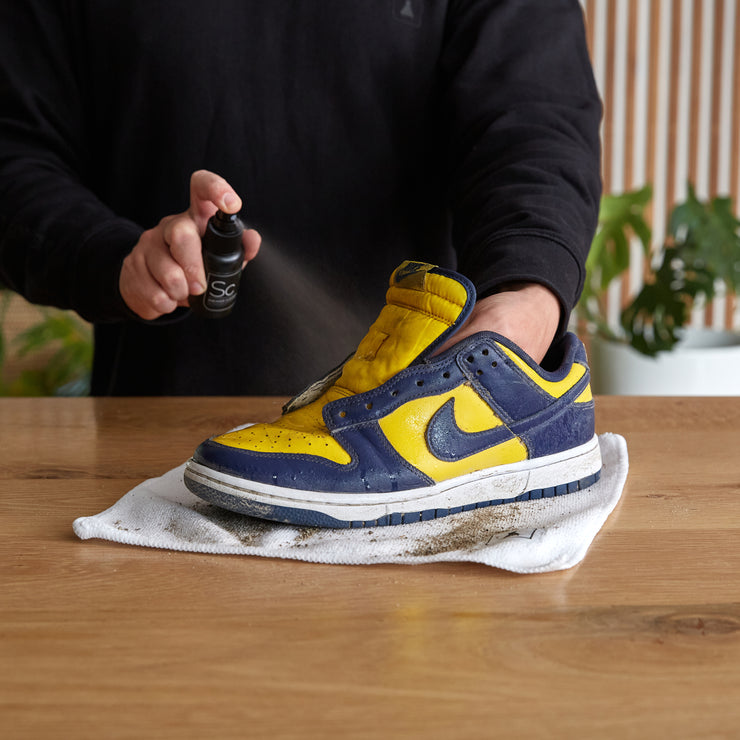
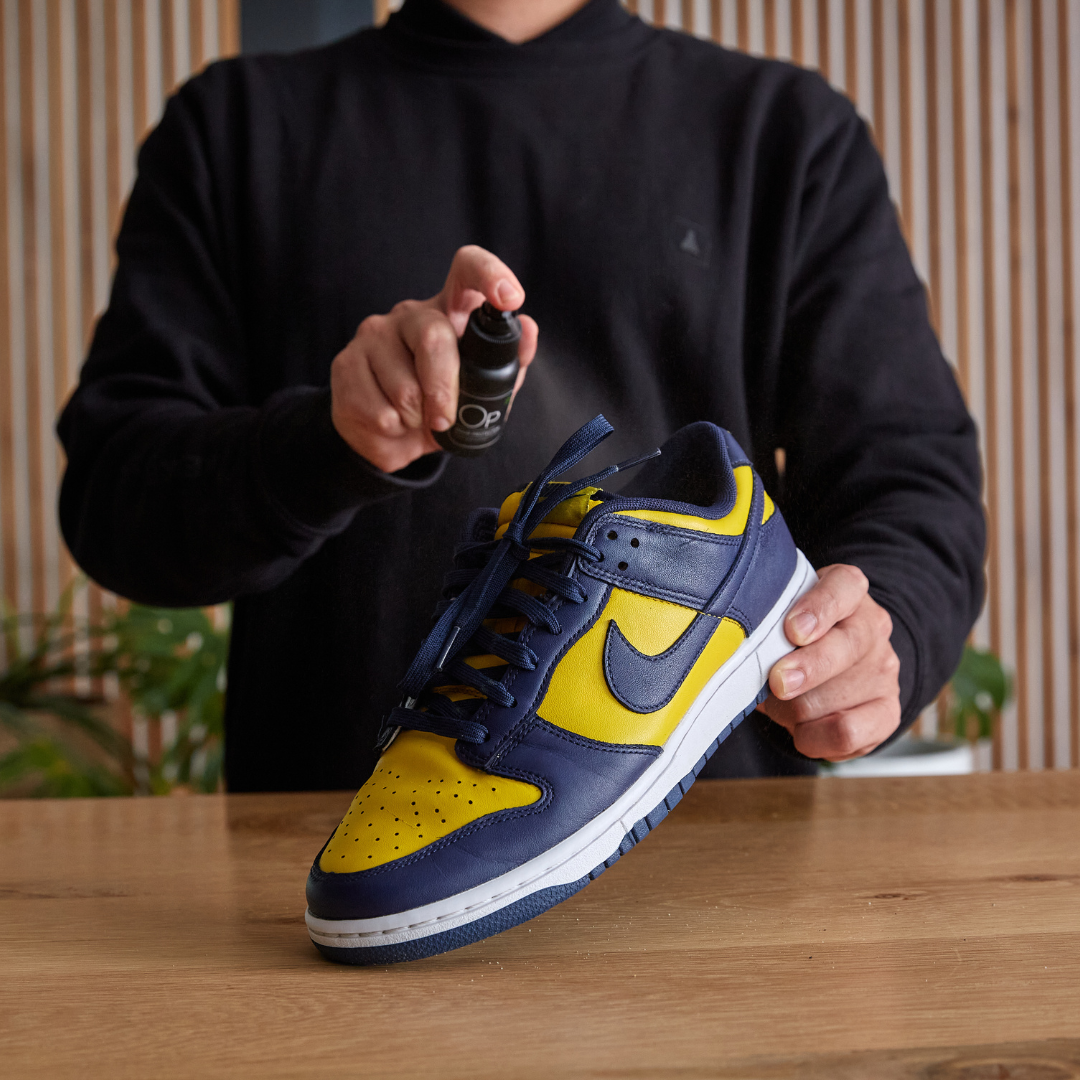
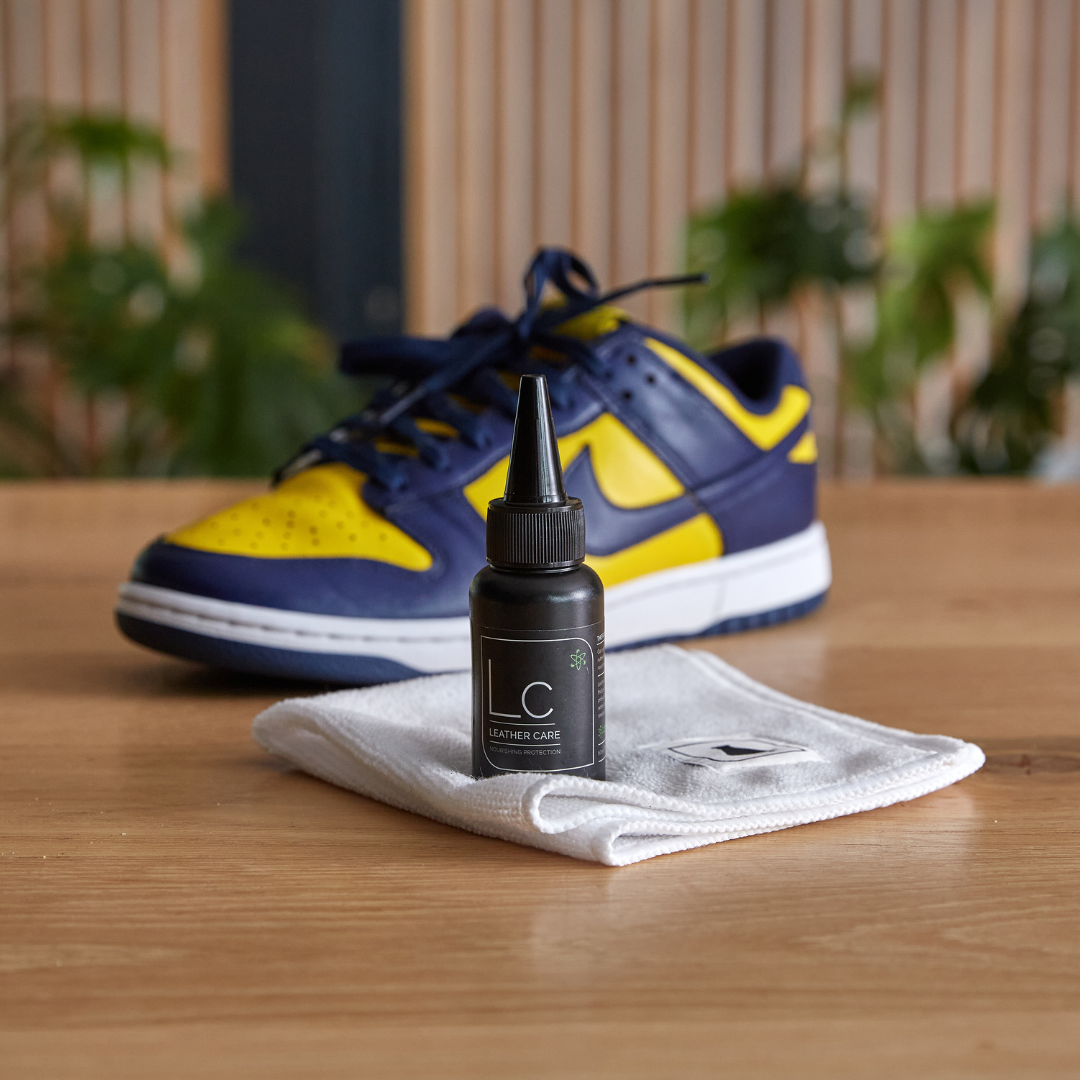
Step 8:
Lastly, use our Leather Care to nourish and protect the leather of the sneaker. This will protect the leather from harmful UV rays and will prevent the leather from cracking.
Step 9:
Wear your sneakers!
Lastly, use our Leather Care to nourish and protect the leather of the sneaker. This will protect the leather from harmful UV rays and will prevent the leather from cracking.
Step 9:
Wear your sneakers!
[ Follow ]