How To Clean New Balance 990v5
[ How To ]
Article
 Play video
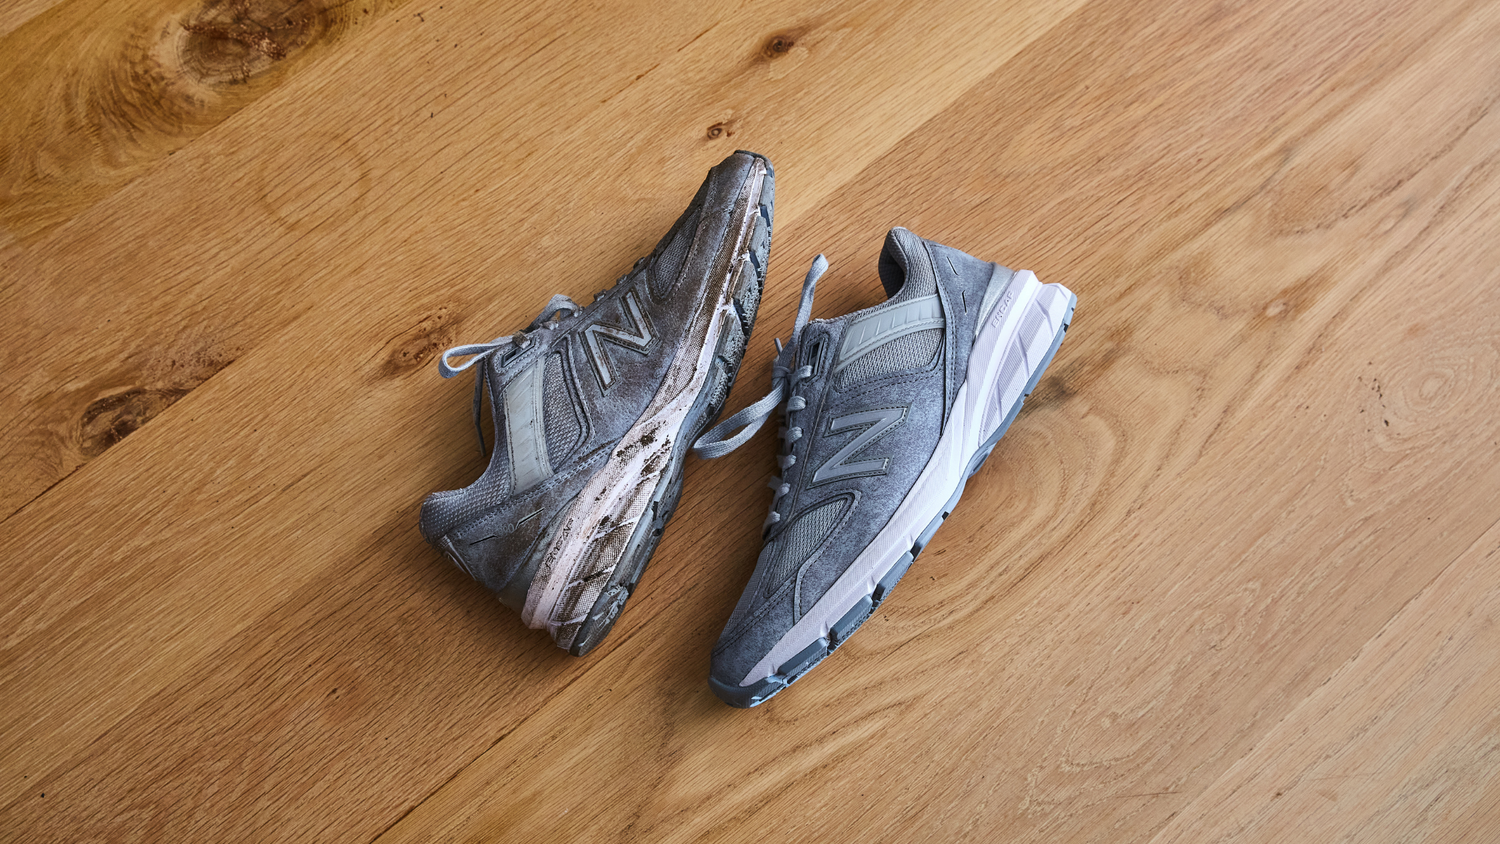
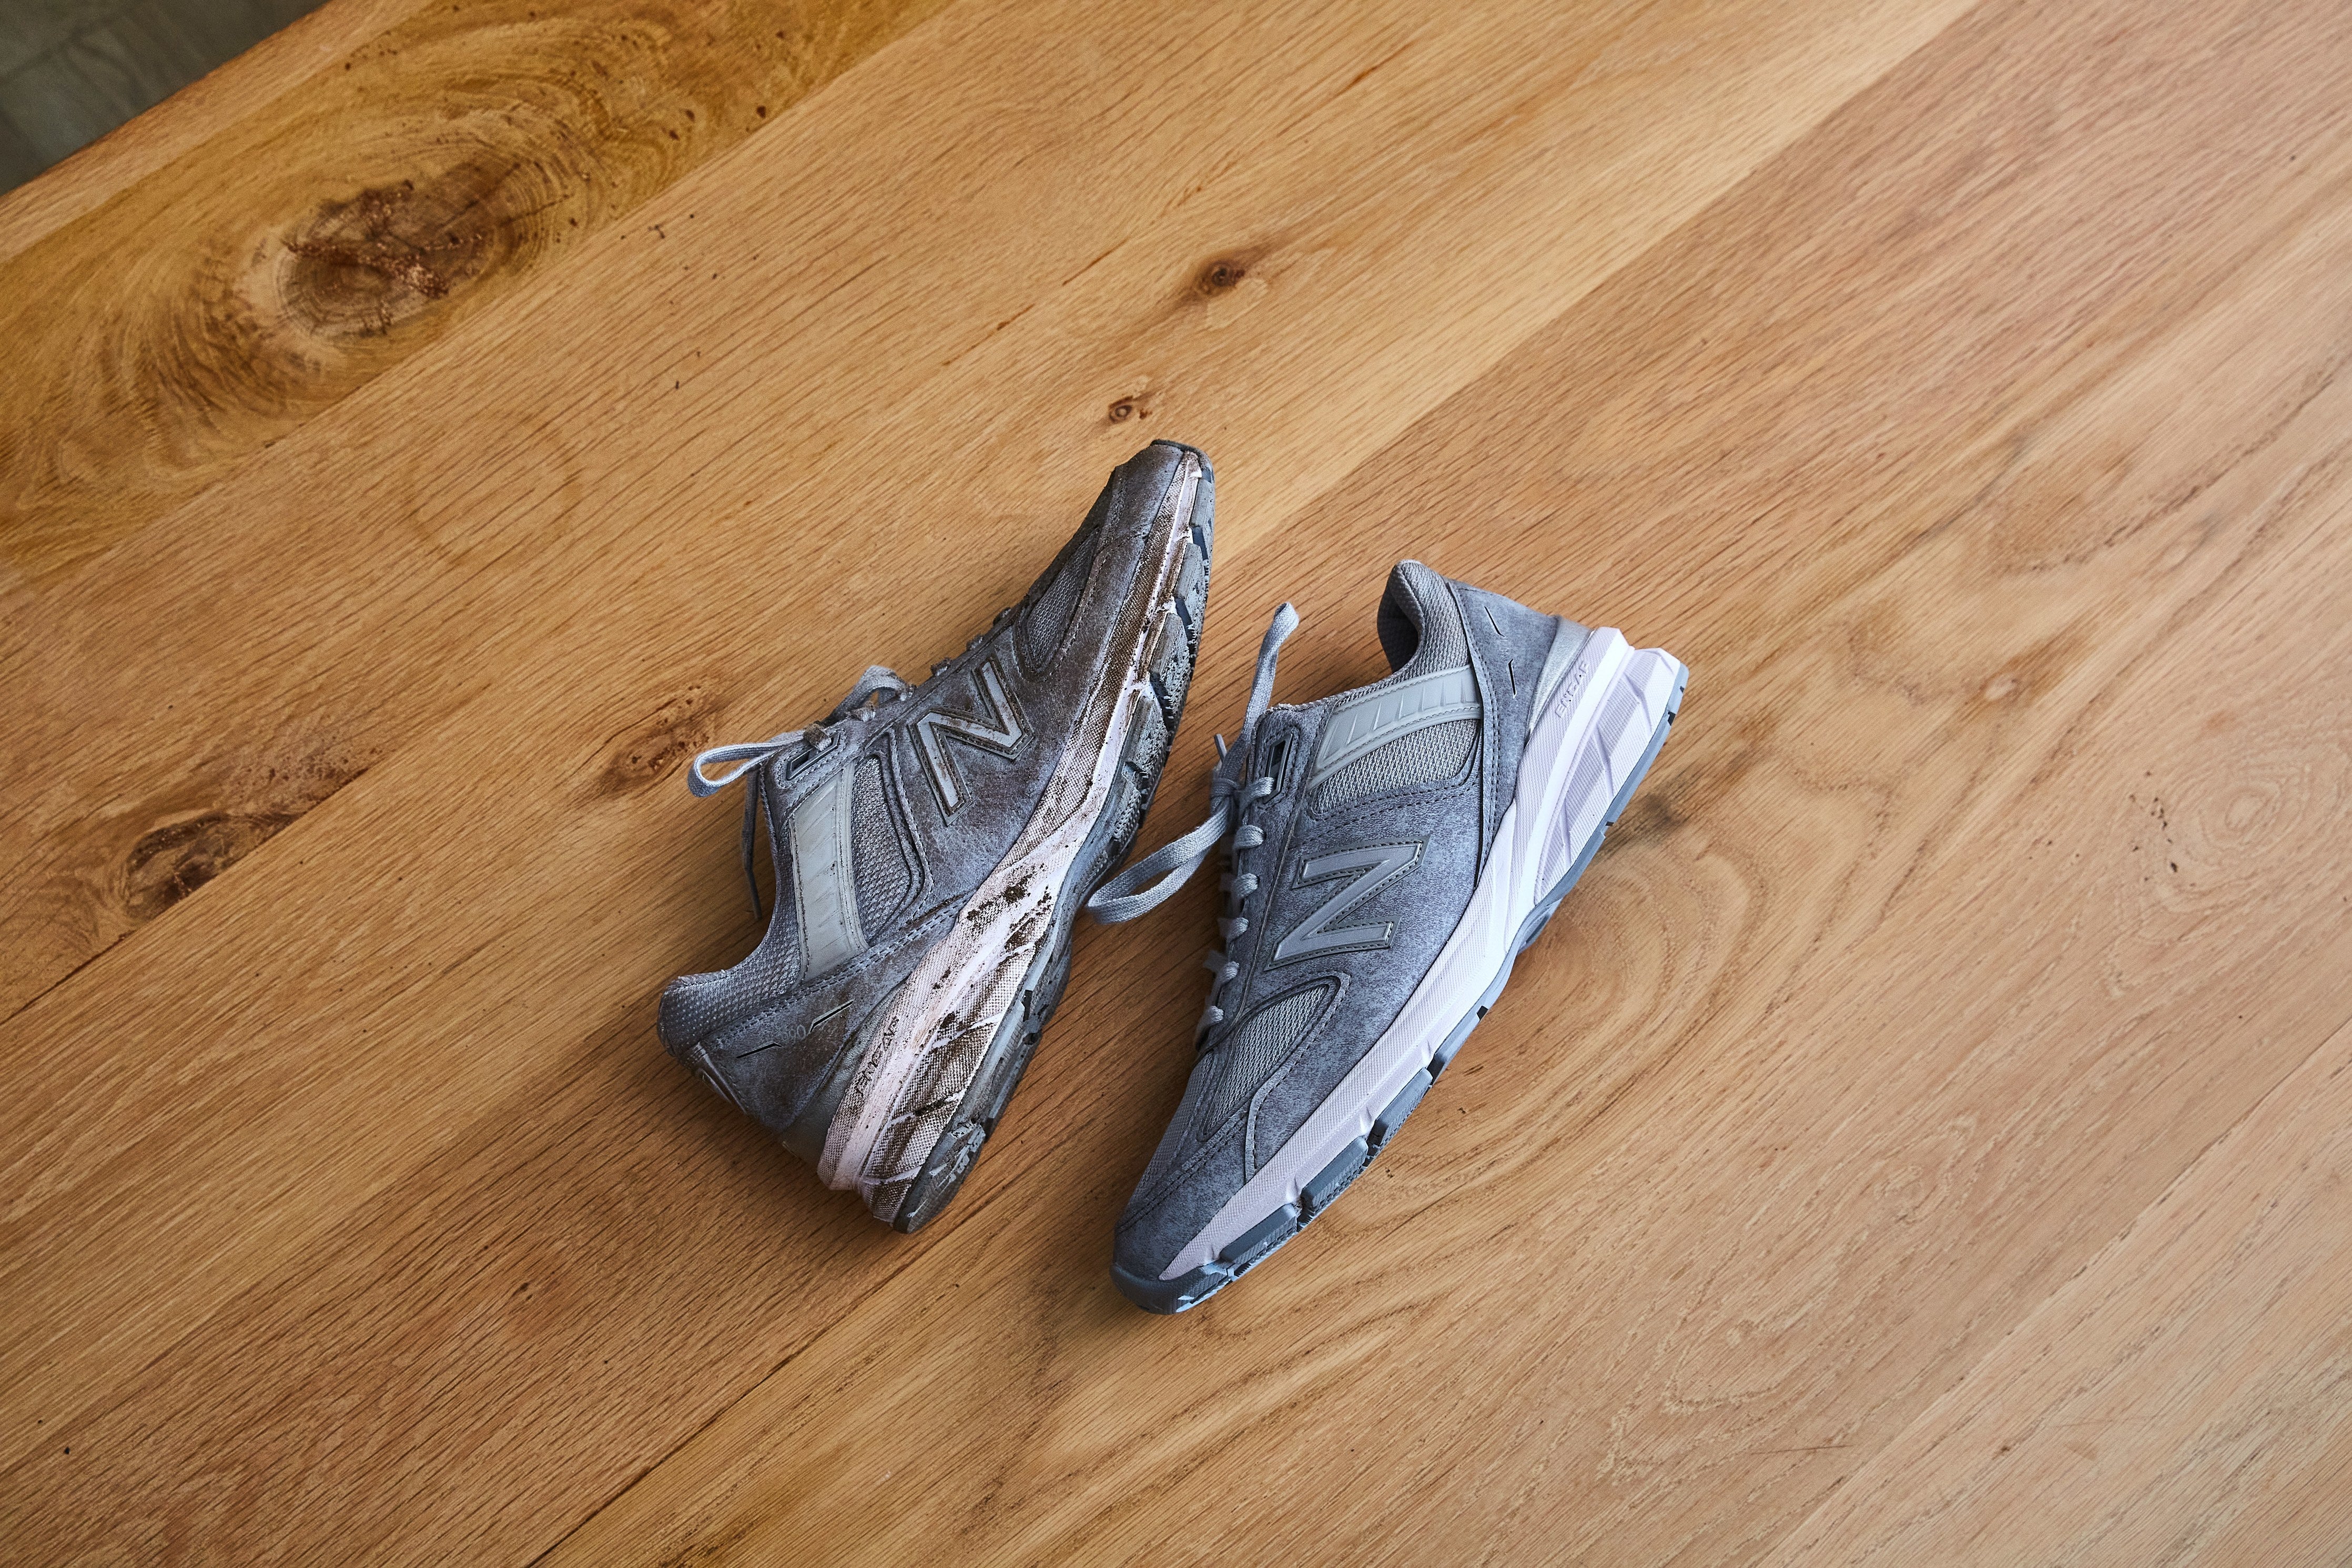
Today we’re working with a dirty pair of the New Balance 990v5. These specific pairs are the Vegan friendly MADE in USA model that features a synthetic construction made without the use of animal or animal by-products, the addition of TPU accents, and Ortholite inserts.
After a long build up, this pair of 990s released in January 2022. The first iteration of the 990 hit shelves in 1982 and has since seen different version releases with updated design and functionality. The 990’s silhouette makes it a staple in any sneaker rotation!
After a long build up, this pair of 990s released in January 2022. The first iteration of the 990 hit shelves in 1982 and has since seen different version releases with updated design and functionality. The 990’s silhouette makes it a staple in any sneaker rotation!
Sneaker LAB is excited to announce our partnership with New Balance in the Asia-Pacific regions. Now you can purchase your favourite Sneaker LAB products while you’re shopping for the latest pair of New Balance sneakers.
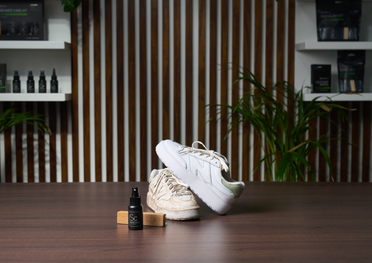
We used the products found in our Premium Kit to clean and look after these pairs. The Premium Kit consists of our Sneaker Cleaner, Sneaker Protector, Odor Protector and Premium Brush.
We used the products found in our Premium Kit to clean and look after these pairs. The Premium Kit consists of our Sneaker Cleaner, Sneaker Protector, Odor Protector and Premium Brush.


Step 1:
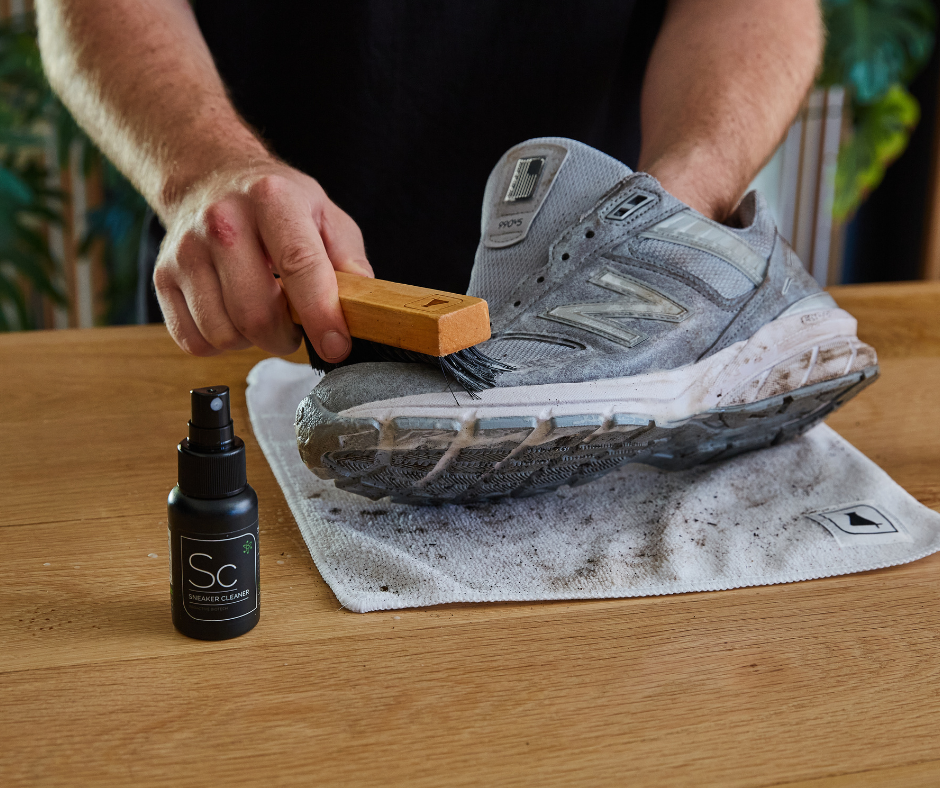
Get your dirty New Balance sneakers and prepare to clean them by removing the laces and giving them a dry brush with our Premium Brush. You will clean the laces at a later stage and the dry brush will remove any excess dirt on the sneaker and make the deep cleaning process easier.
Get your dirty New Balance sneakers and prepare to clean them by removing the laces and giving them a dry brush with our Premium Brush. You will clean the laces at a later stage and the dry brush will remove any excess dirt on the sneaker and make the deep cleaning process easier.
Step 2:
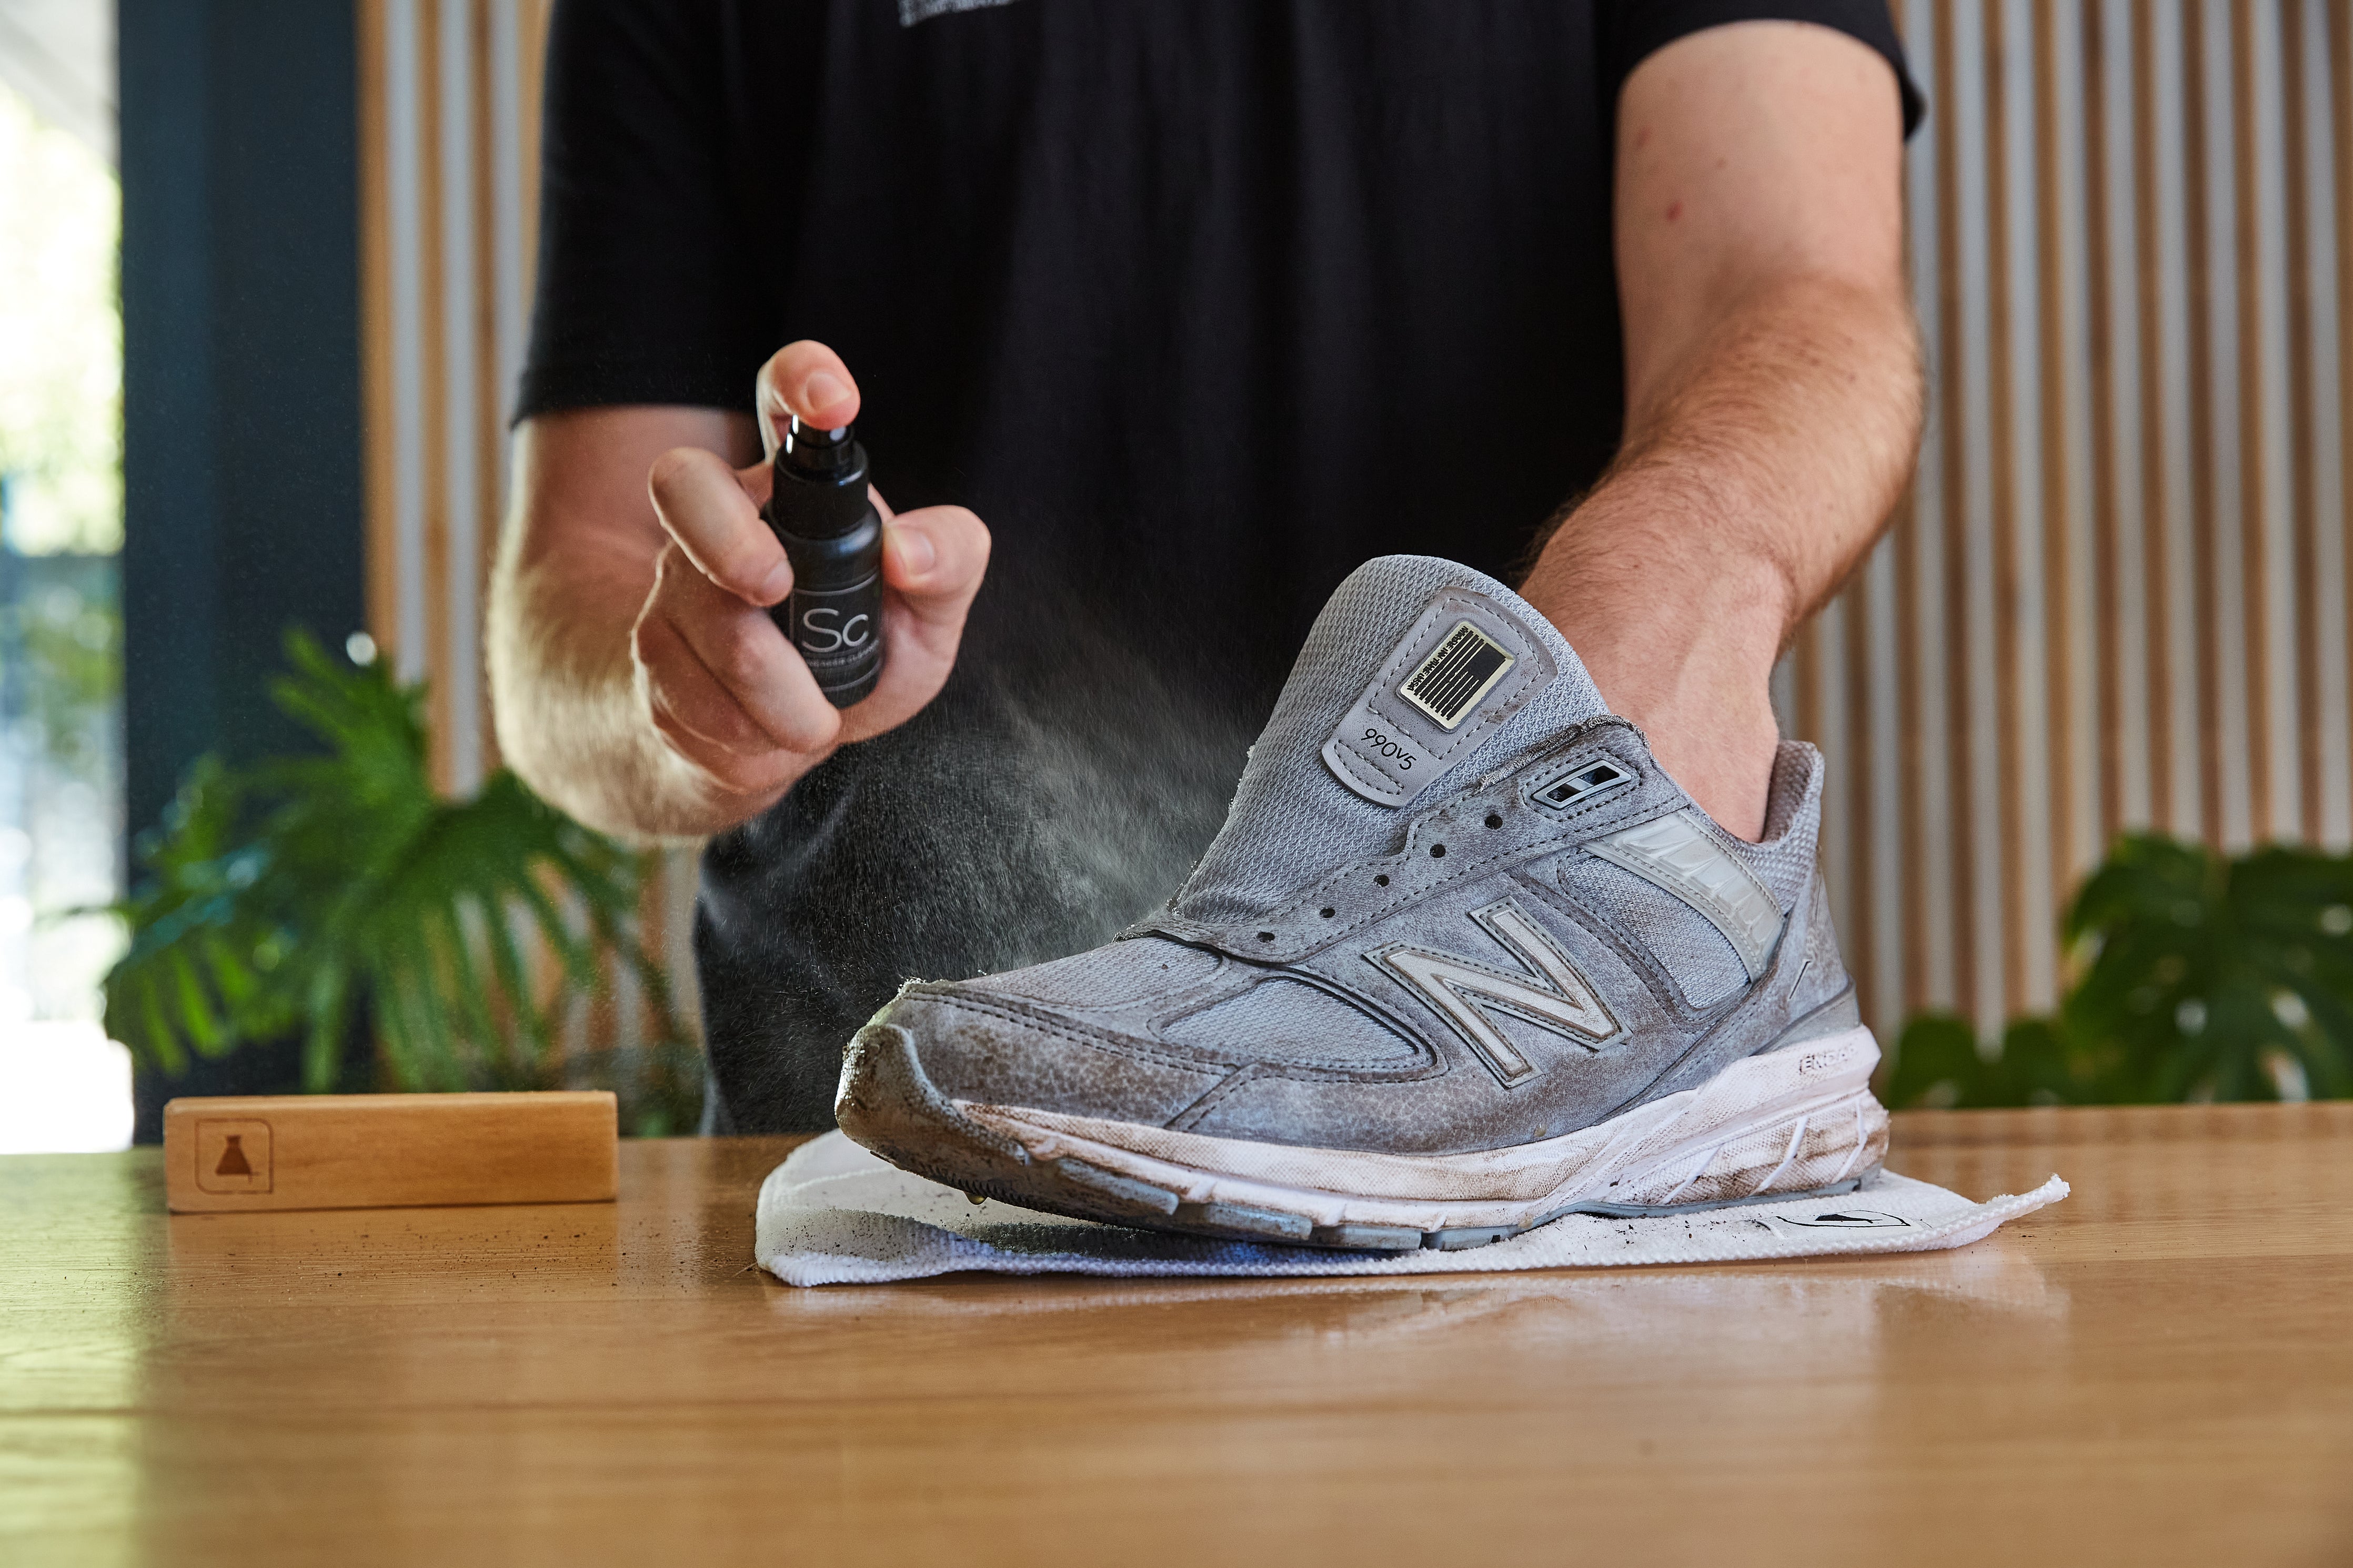
Next, you will spray Sneaker Cleaner around the uppers of the sneaker, focusing on heavily dirtied areas. Our Sneaker Cleaner contains no soap or chemicals or harmful toxins, so you'll be cleaning in the greenest way possible!
Step 3:
Grab your Premium Brush and a container of water. Dip the Premium Brush in water and gently tap off excess water. Since this specific New Balance doesn't contain traditional suede, you won't have to worry about using water.
However, if your 990 model contains suede you will have to use less water and make sure to dry the suede as best as possible with a Microfiber Towel.
Start scrubbing in a circular motion along the mesh panels and make your way to the suede sections. Wipe off excess moisture and foam with a Microfibre Towel.
Step 4:
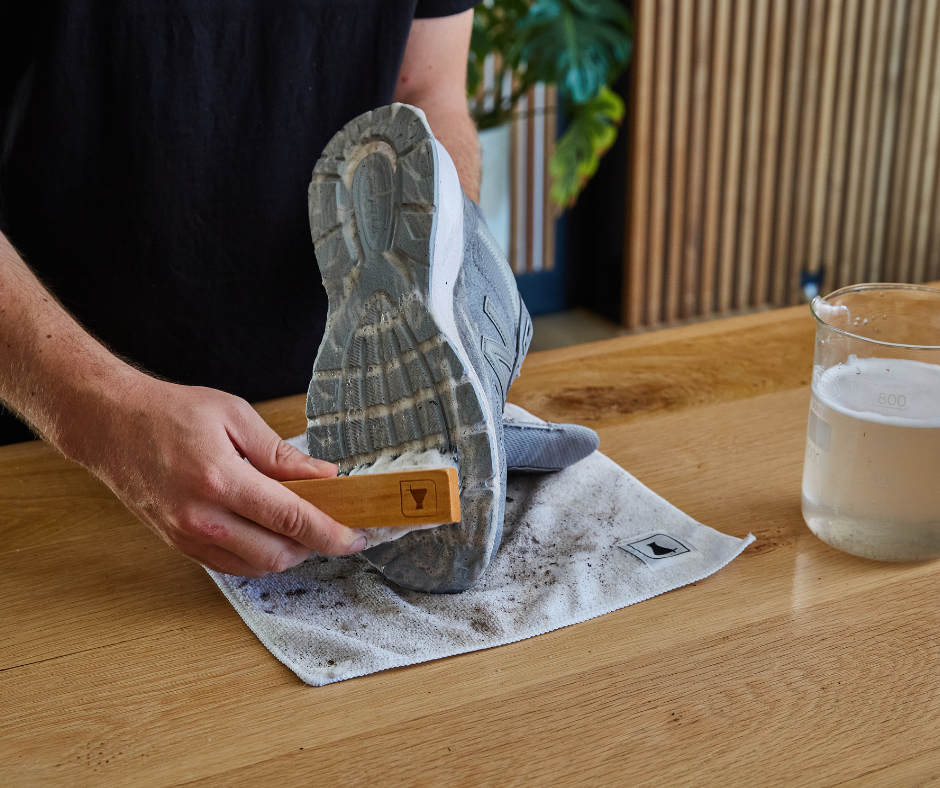
You will then move down to the soles and midsoles of the sneaker. Here you can spray more Sneaker Cleaner to affected areas. Dip your Premium Brush in more water and then scrub the soles. You can apply more pressure when scrubbing to remove stubborn dirt.
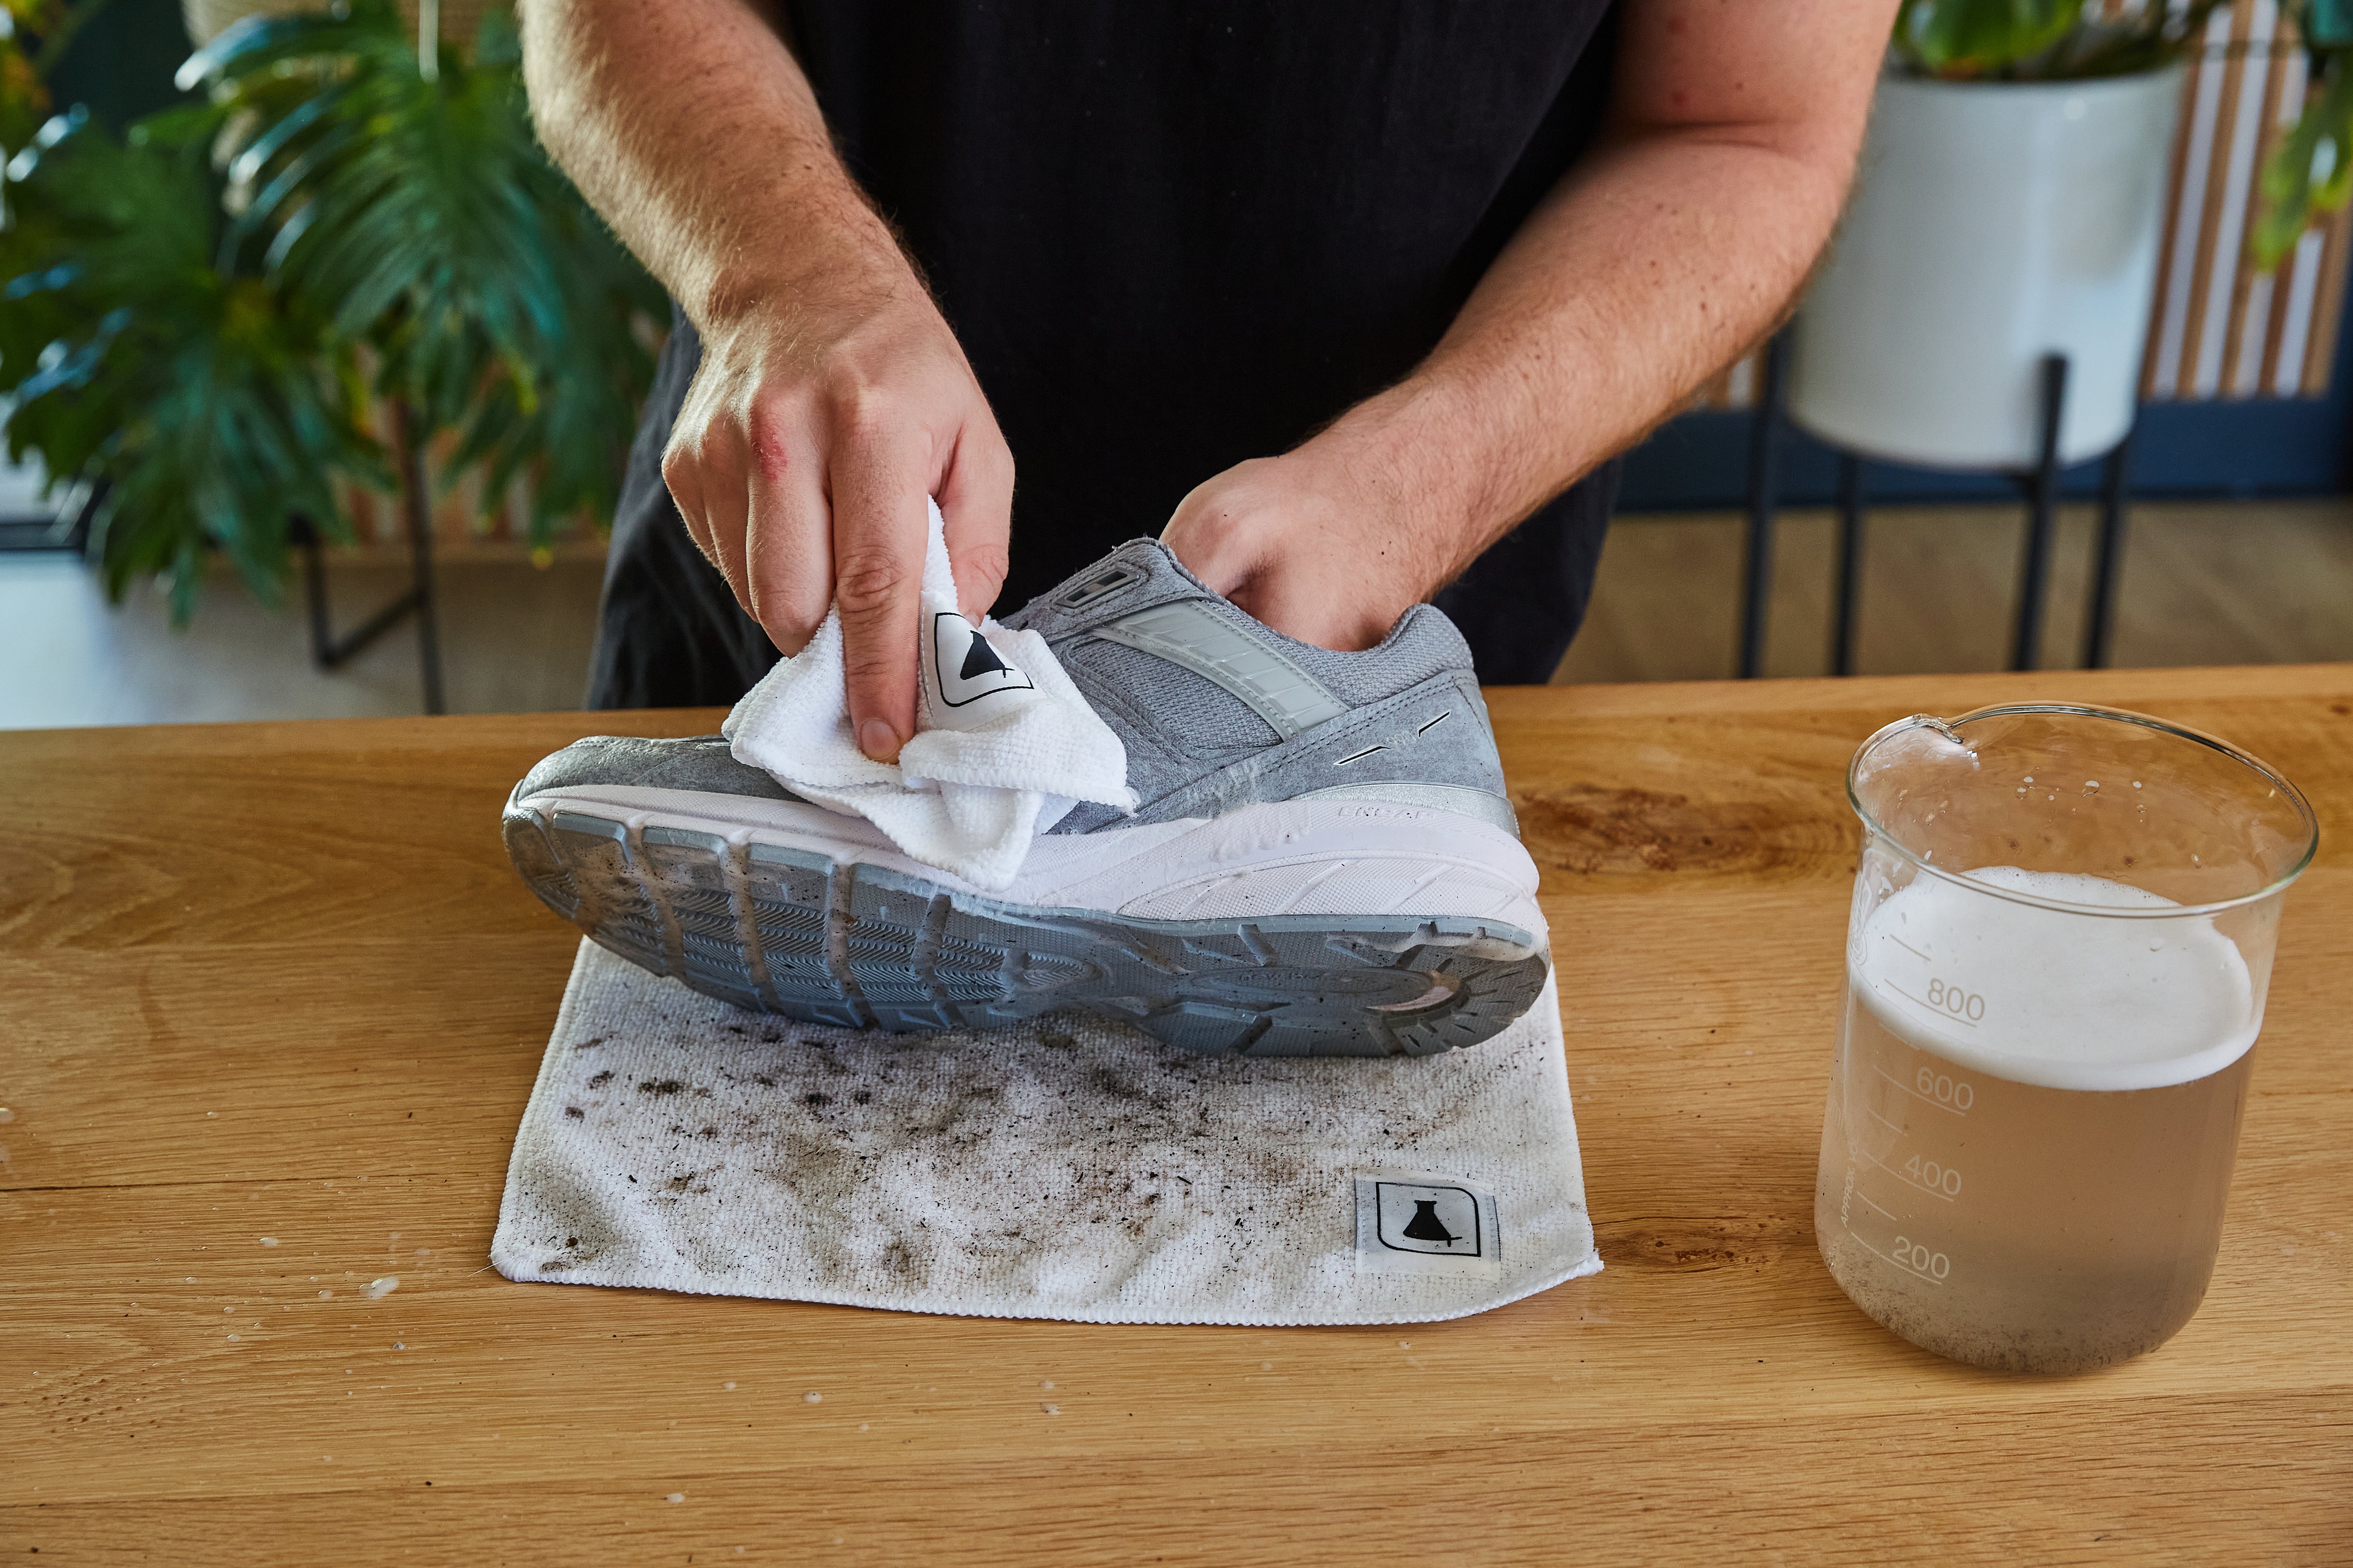
Step 5:
Wipe off all excess foam, moisture or dirt with a Microfiber Towel. Here's a top tip from us: if there are any tricky dirt spots to get to, use a Sneaker Wipe to focus on cleaning those areas. Then, set the sneakers aside to dry.
Step 6:
Whilst your sneakers are drying, grab the laces. Cup the laces in your hand and spray Sneaker Cleaner on them. Then rubbing them around in your hands to spread the Sneaker Cleaner and then dip them into a container of clean water. The water and Sneaker Cleaner will react to create a foam. Continue to rub the laces together until you can see the dirt being removed. Then ring out the moisture and set aside to dry.
You will then move down to the soles and midsoles of the sneaker. Here you can spray more Sneaker Cleaner to affected areas. Dip your Premium Brush in more water and then scrub the soles. You can apply more pressure when scrubbing to remove stubborn dirt.
Step 5:
Wipe off all excess foam, moisture or dirt with a Microfiber Towel. Here's a top tip from us: if there are any tricky dirt spots to get to, use a Sneaker Wipe to focus on cleaning those areas. Then, set the sneakers aside to dry.
Step 6:
Whilst your sneakers are drying, grab the laces. Cup the laces in your hand and spray Sneaker Cleaner on them. Then rubbing them around in your hands to spread the Sneaker Cleaner and then dip them into a container of clean water. The water and Sneaker Cleaner will react to create a foam. Continue to rub the laces together until you can see the dirt being removed. Then ring out the moisture and set aside to dry.
Step 7:
When the sneakers and laces are dry, re-lace the sneakers and prepare to apply the protection products!
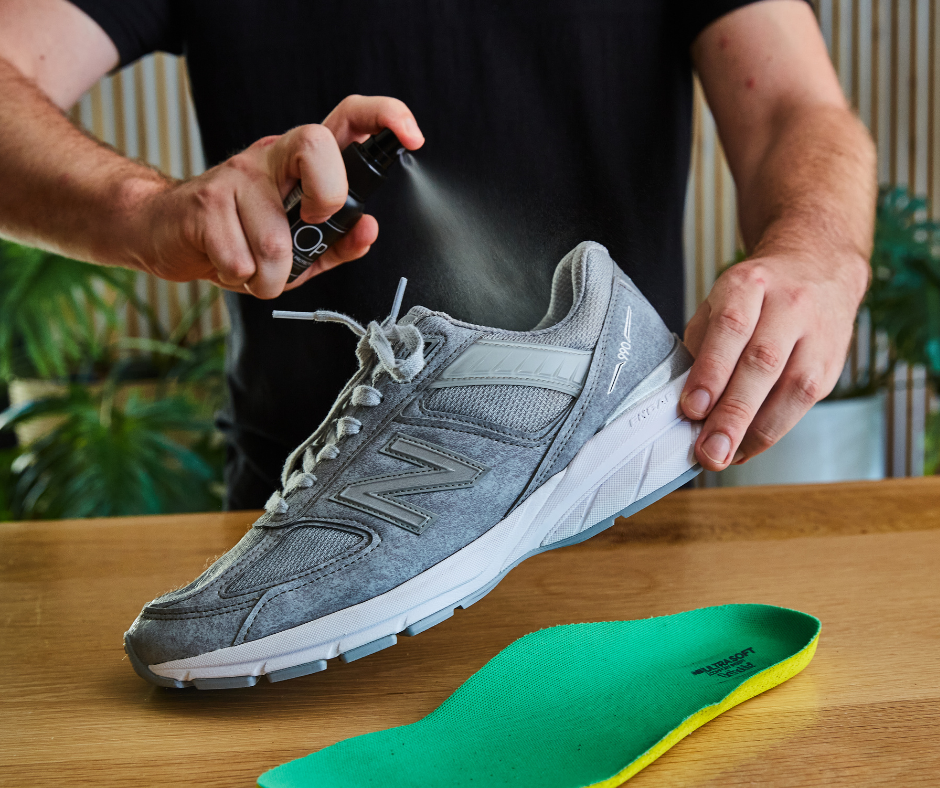
Step 8:
Use our Odor Protector to remove any unwanted smells and to combat bad bacteria from building up inside of the sneaker. Spray the inside of your sneakers and the inner sole (if you can remove it).Step 9:
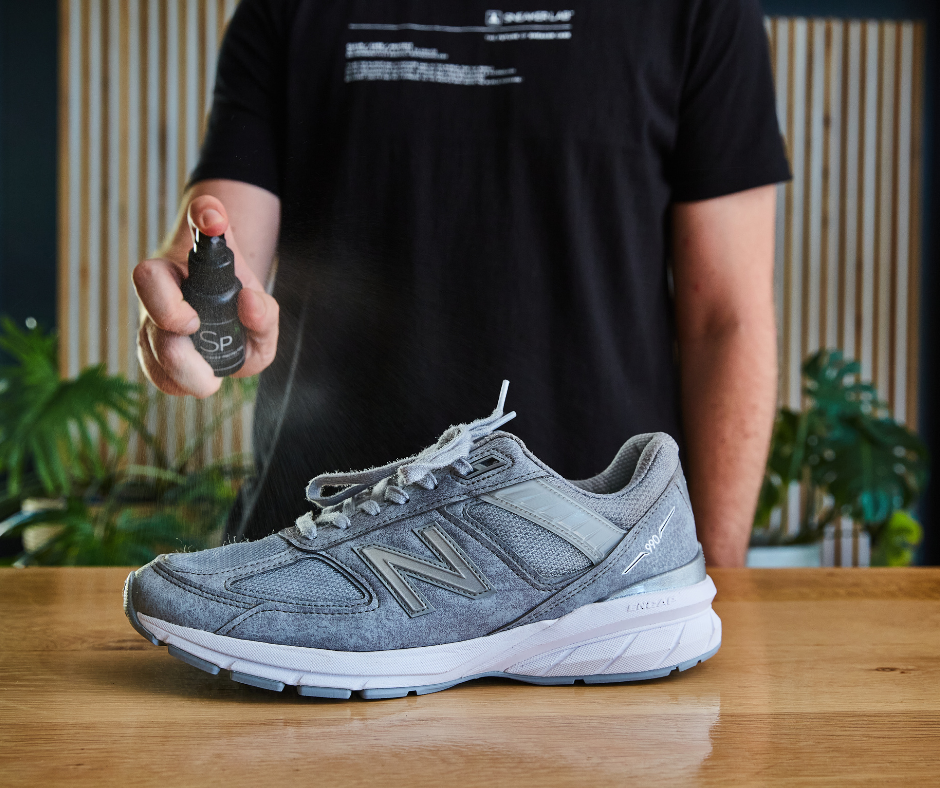
The last step in the process will be to apply our Sneaker Protector to prevent any dirt and stains from setting into the sneaker. Spray Sneaker Protector around the sneaker and let it rest over night.
Step 10:
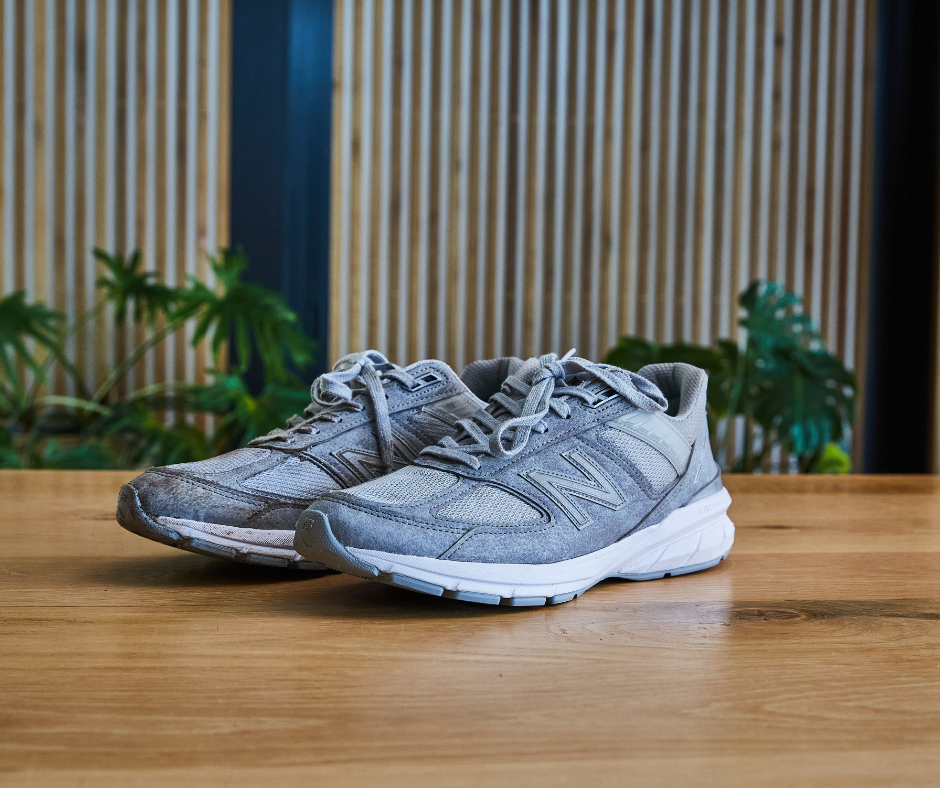
Wear your sneakers! Now that they're looking fresh and have the necessary products protecting them, you can hit the streets in confidence.
When the sneakers and laces are dry, re-lace the sneakers and prepare to apply the protection products!
Step 8:
Use our Odor Protector to remove any unwanted smells and to combat bad bacteria from building up inside of the sneaker. Spray the inside of your sneakers and the inner sole (if you can remove it).Step 9:
The last step in the process will be to apply our Sneaker Protector to prevent any dirt and stains from setting into the sneaker. Spray Sneaker Protector around the sneaker and let it rest over night.
Step 10:
Wear your sneakers! Now that they're looking fresh and have the necessary products protecting them, you can hit the streets in confidence.
[ Follow ]